Fair & Reasonable Solicitations


Getting Started
1. Navigate to the Authorium application in your browser and log in to your account.
Access https://app.authorium.com/ and enter your email address to sign in to your account.

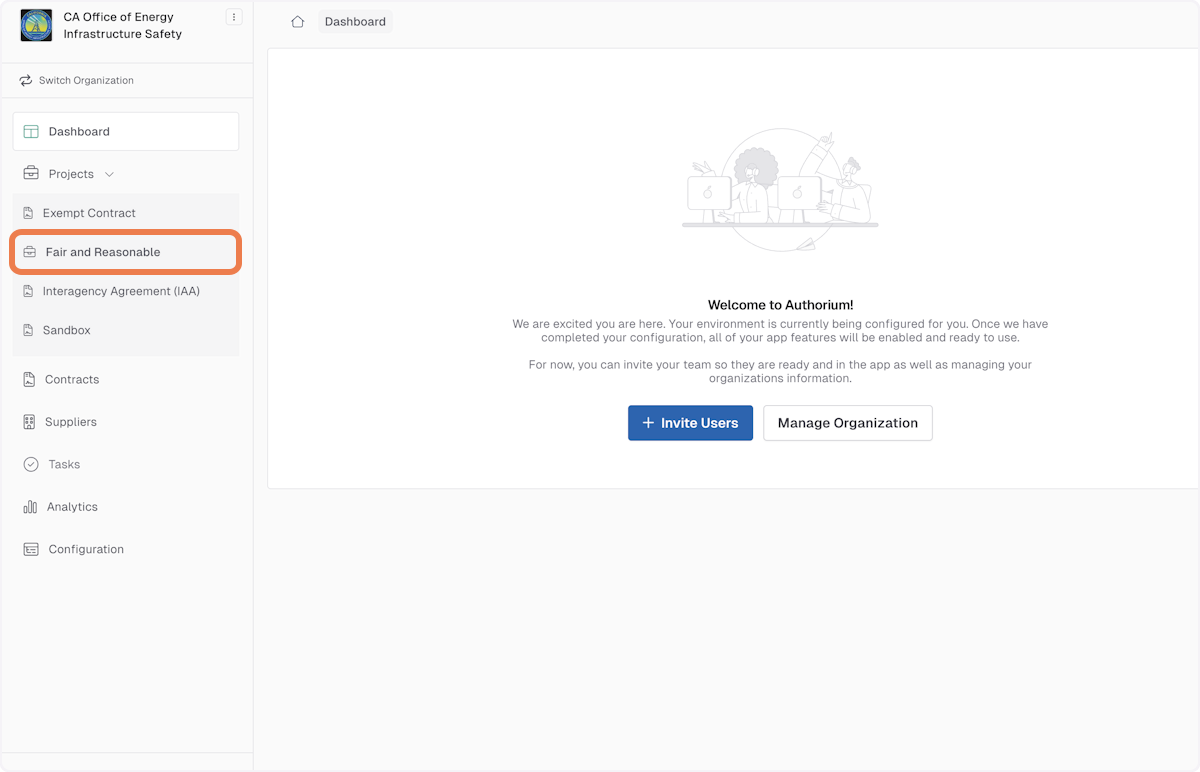
2. Access the Fair and Reasonable Project Type
On the lefthand sidebar, navigate to "Projects," and select "Fair and Reasonable."
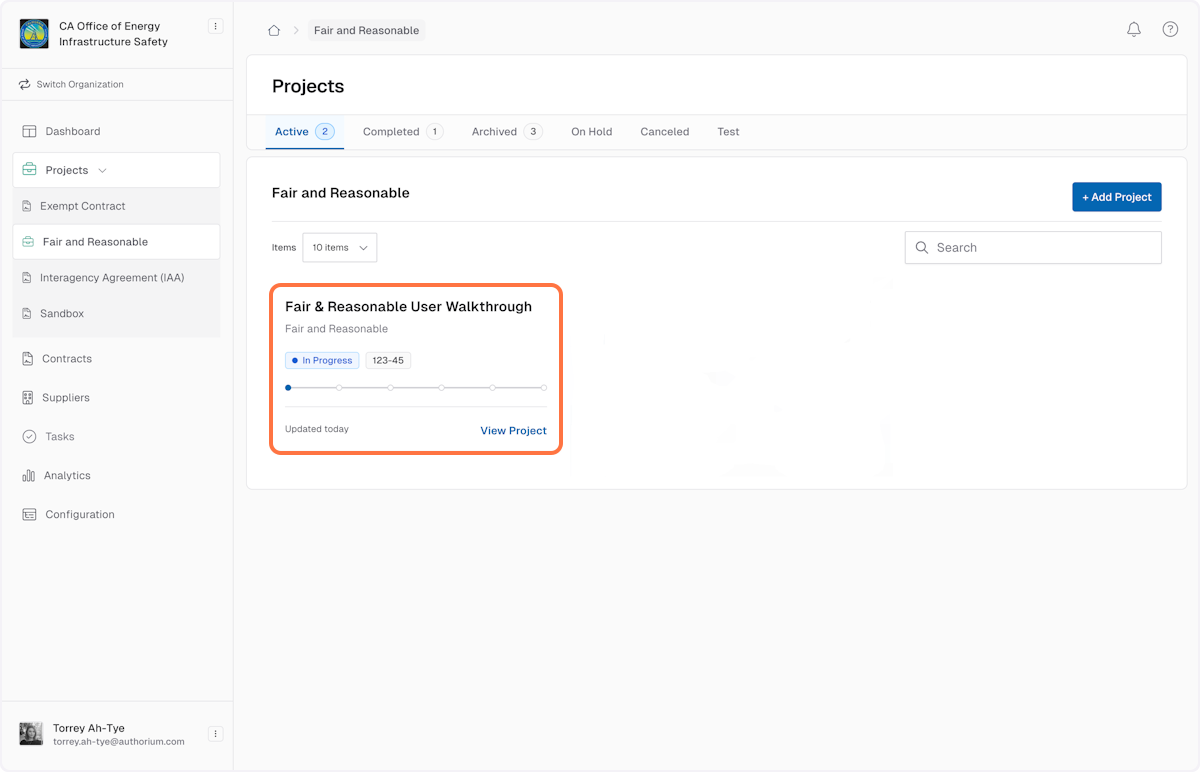
3. Select your Active Project to get started
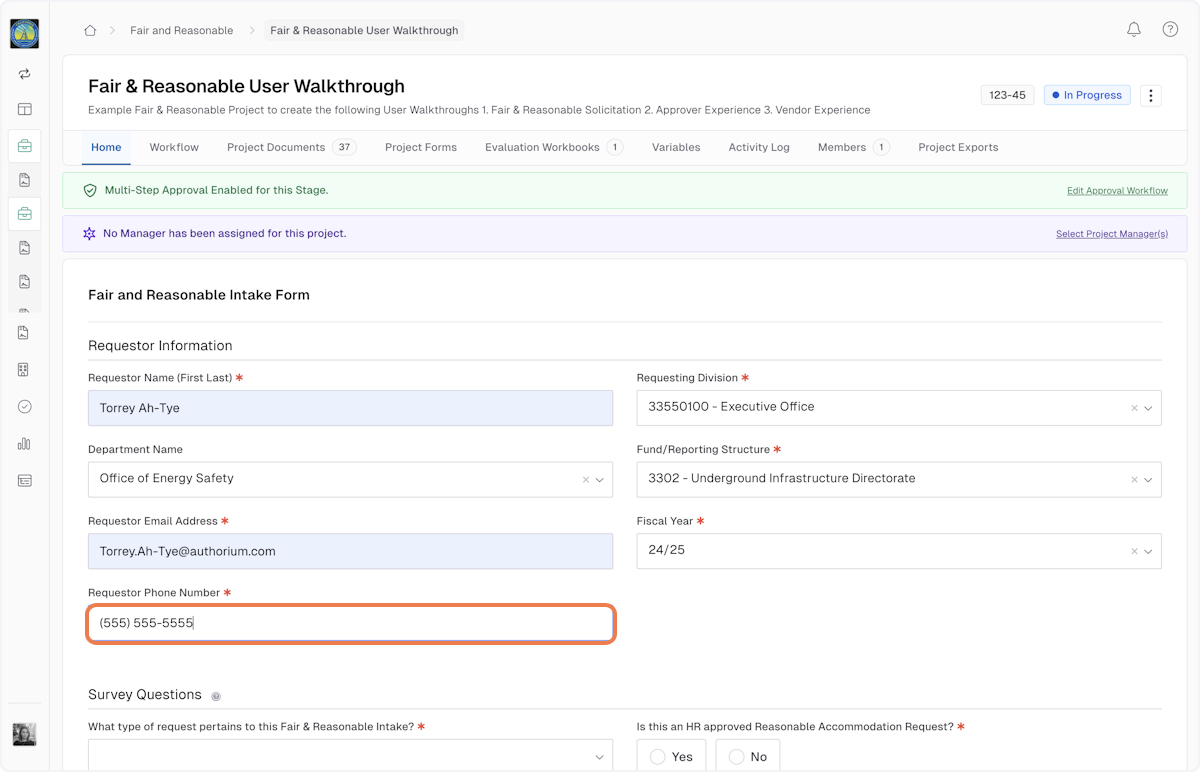
4. Start the Intake Form
Access the Fair & Reasonable Intake Form.
Fill out all relevant fields using the most current solicitation content.
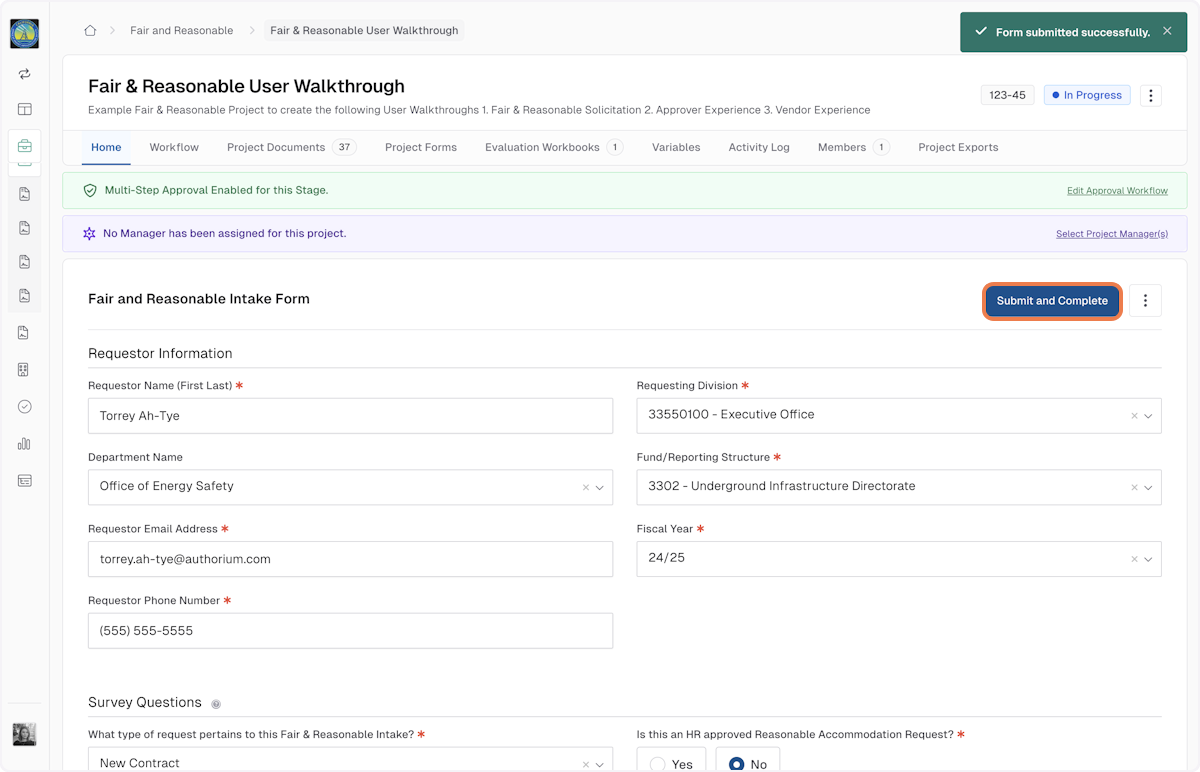
Workflows may vary, but this example includes three parts: Requestor Information, Survey Questions, and Requesting Information
Note: A future update will consolidate this into a global intake form with more standardized contract language.
5. Start the Intake Form - Survey Questions
Fill out all relevant fields using the most current solicitation content.
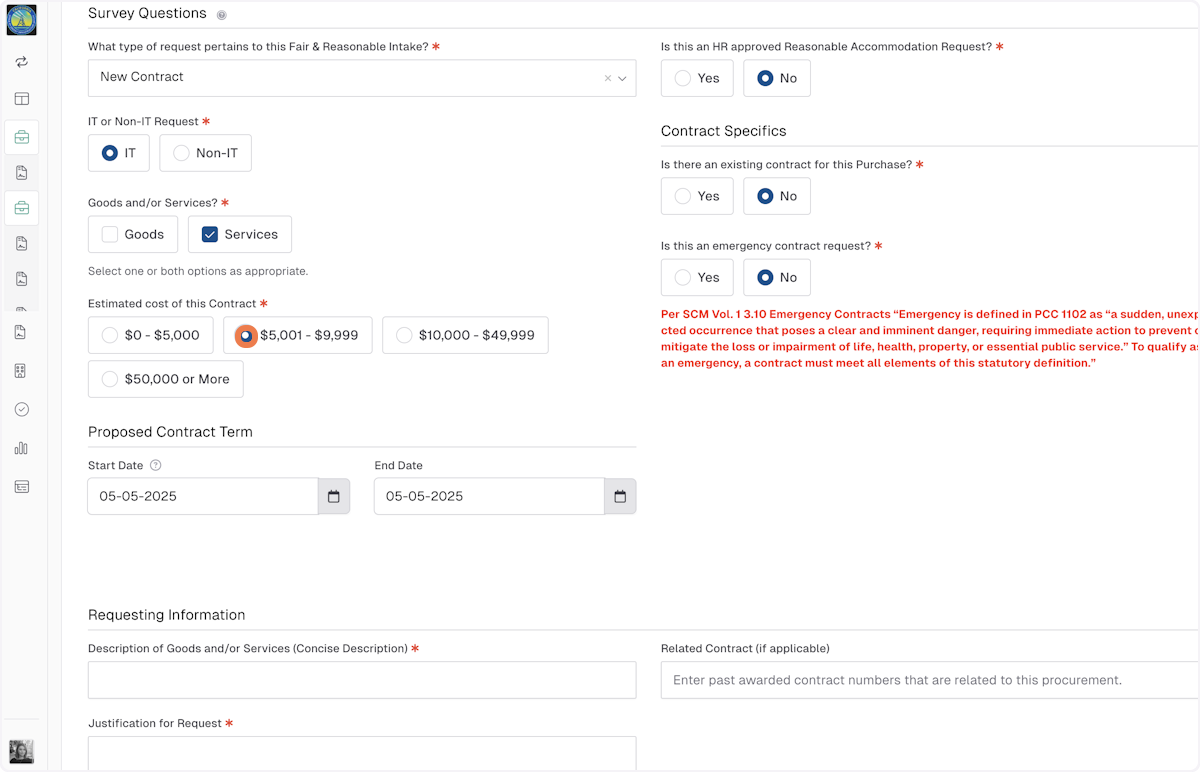
6. Start the Intake Form - Requesting Information
Fill out all relevant fields using the most current solicitation content.
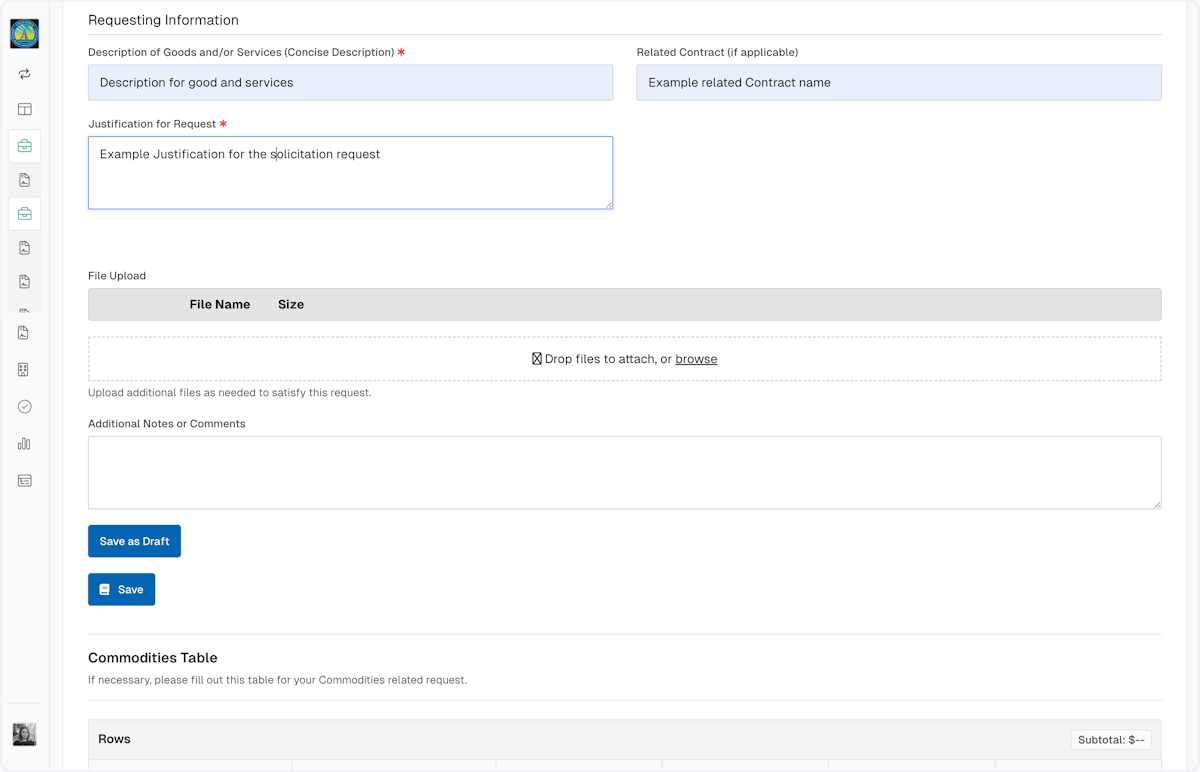
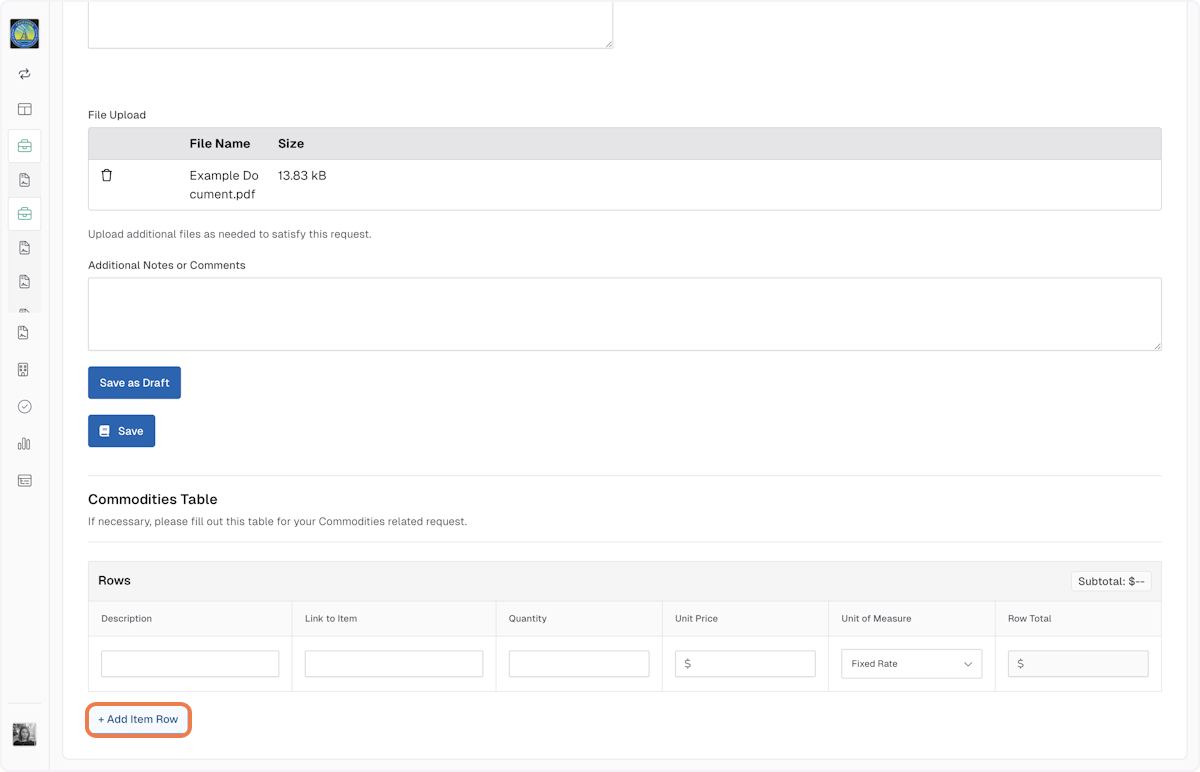
7. Upload Files
To attach a file to the Intake Form, navigate to the File Upload section at the bottom of the page.
Use the file upload field to attach all necessary solicitation documents.
Complete the commodities table at the bottom of the form for any goods/services.

8. Complete the Commodities Table at the bottom of the form for any goods/services.
Expand the table by Clicking on +Add Item Row to customize the table to your specifications.
Note that the Unit of Measure heading has been updated and will now feature a dropdown menu.
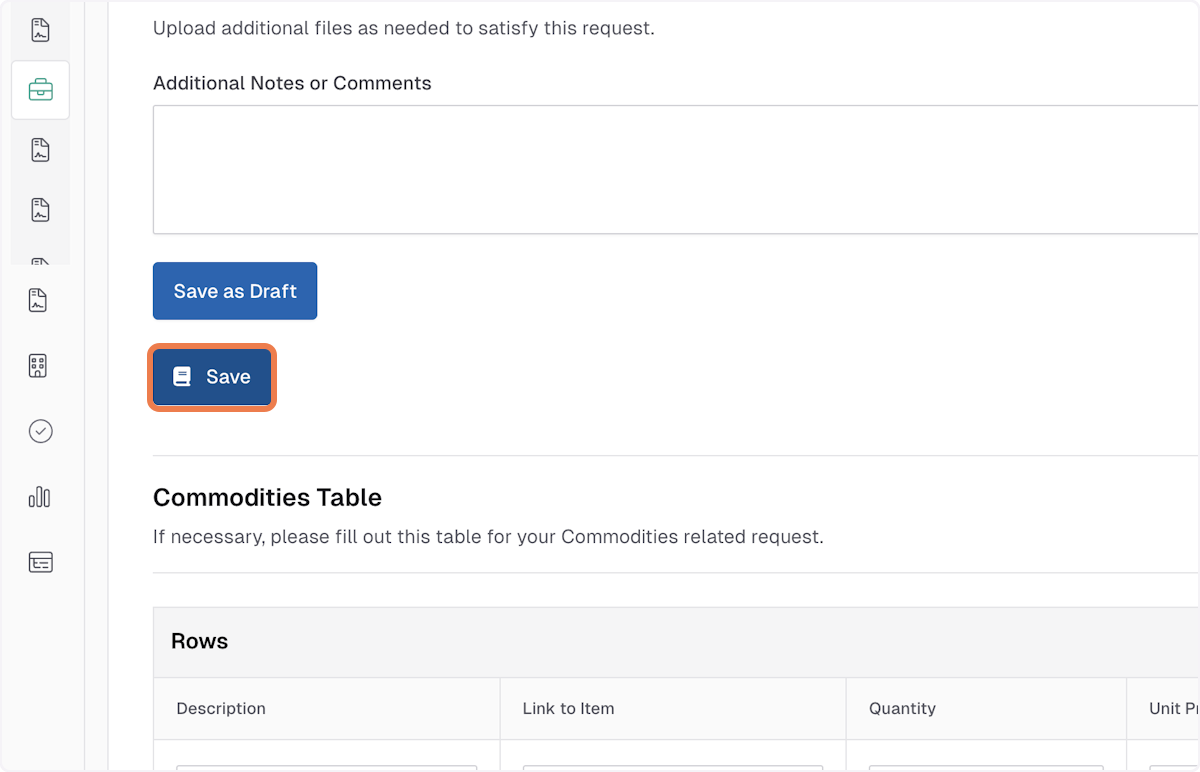
9. Save the Intake Form
10. Click on Submit and Complete to finish the Intake Form
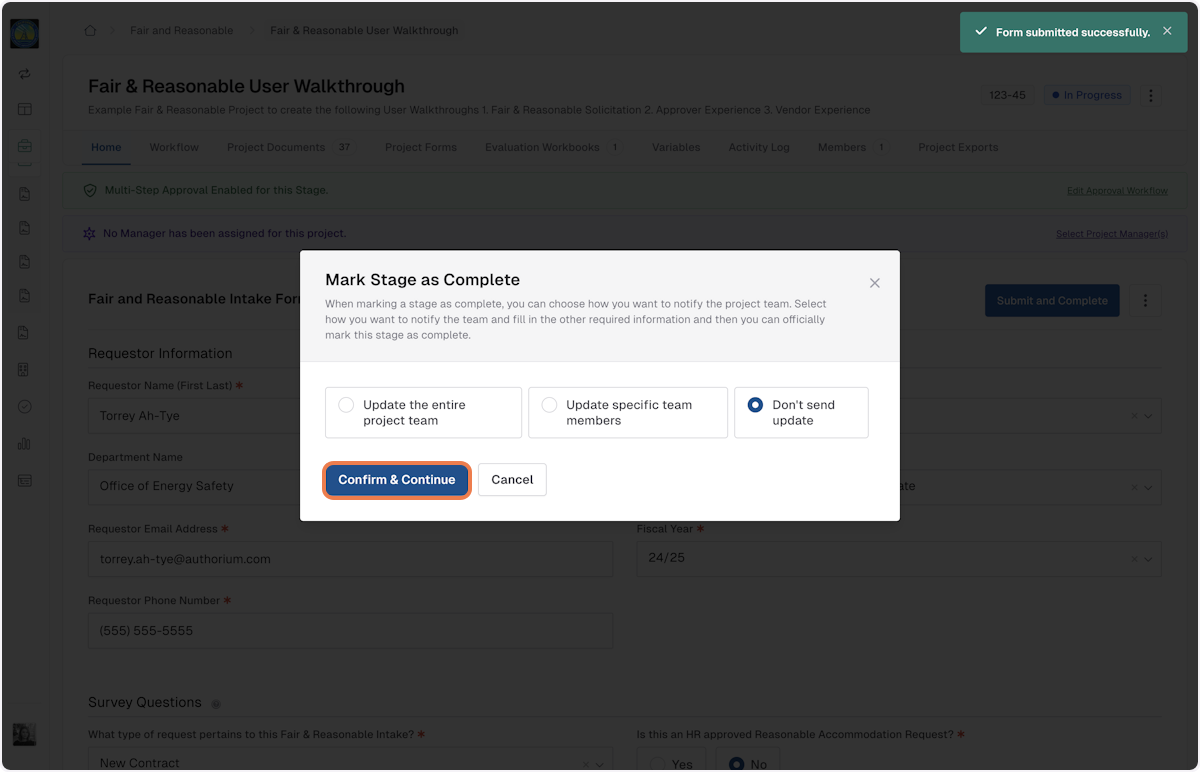
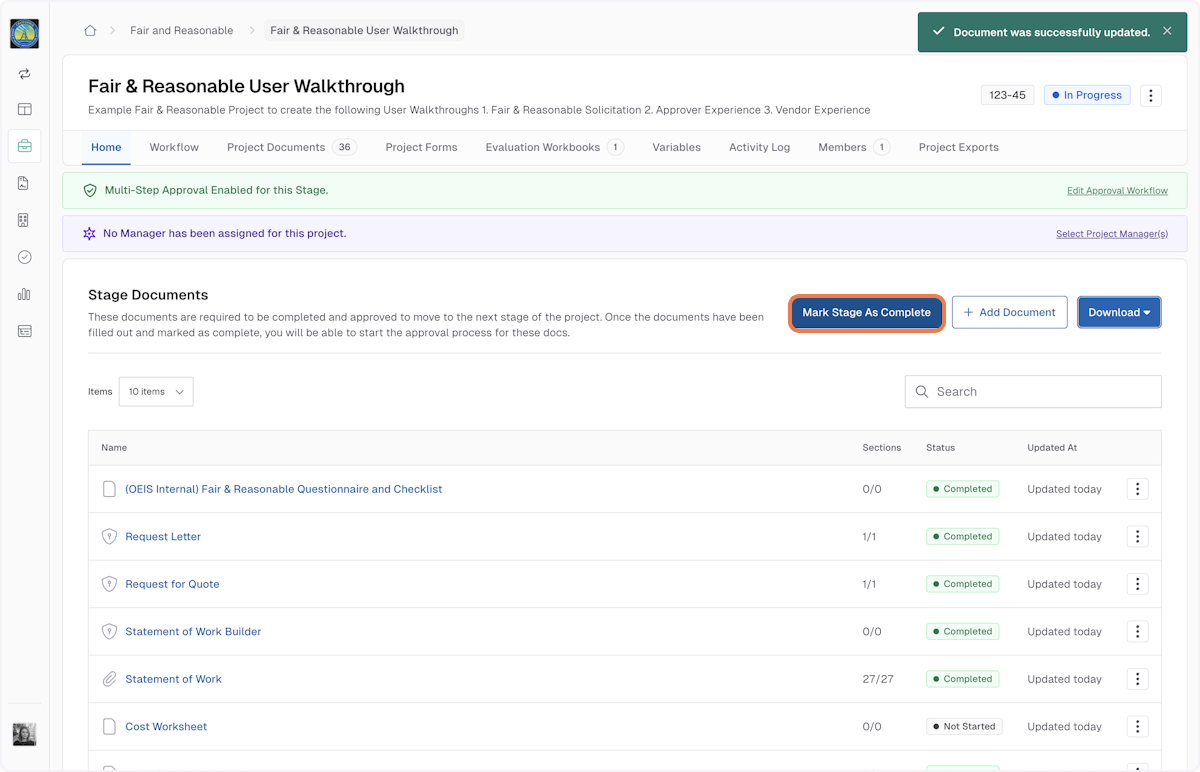
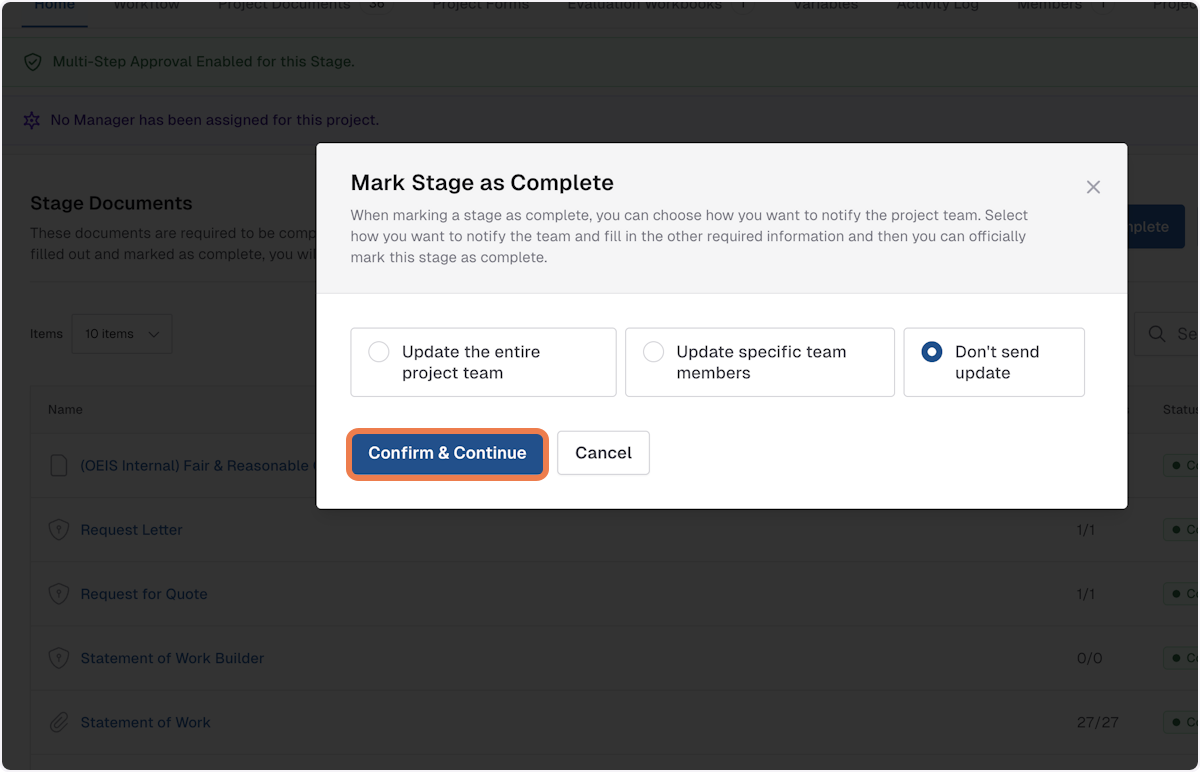
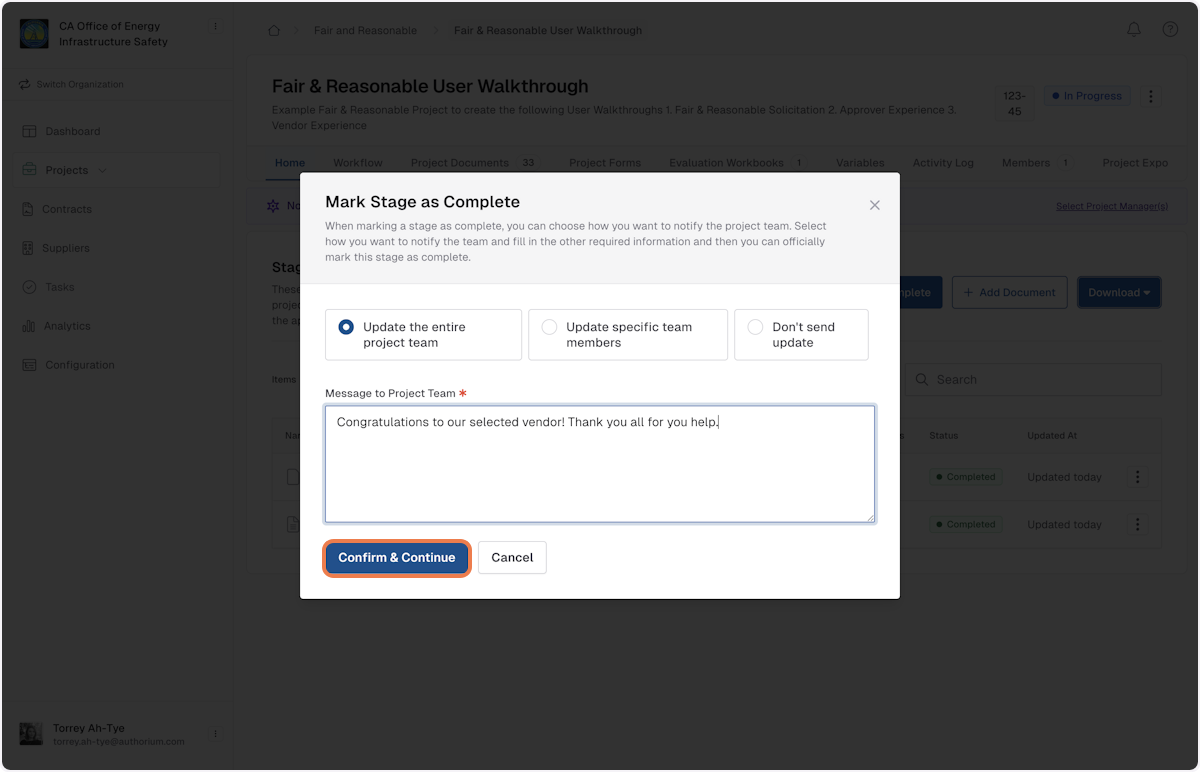
11. Mark the stage as complete
The request will be routed for Stage-Based Approval (manager or designee).
Update your desired notification settings and click on Confirm & Continue.
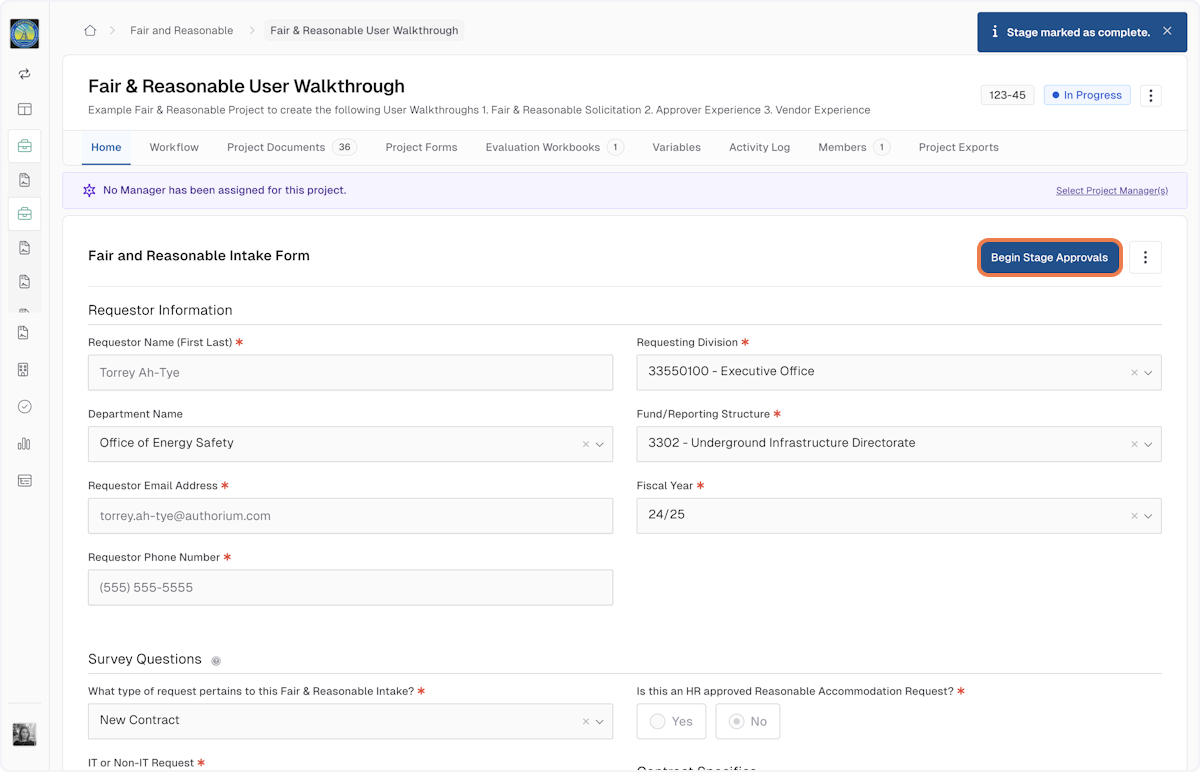
Initial Approvals
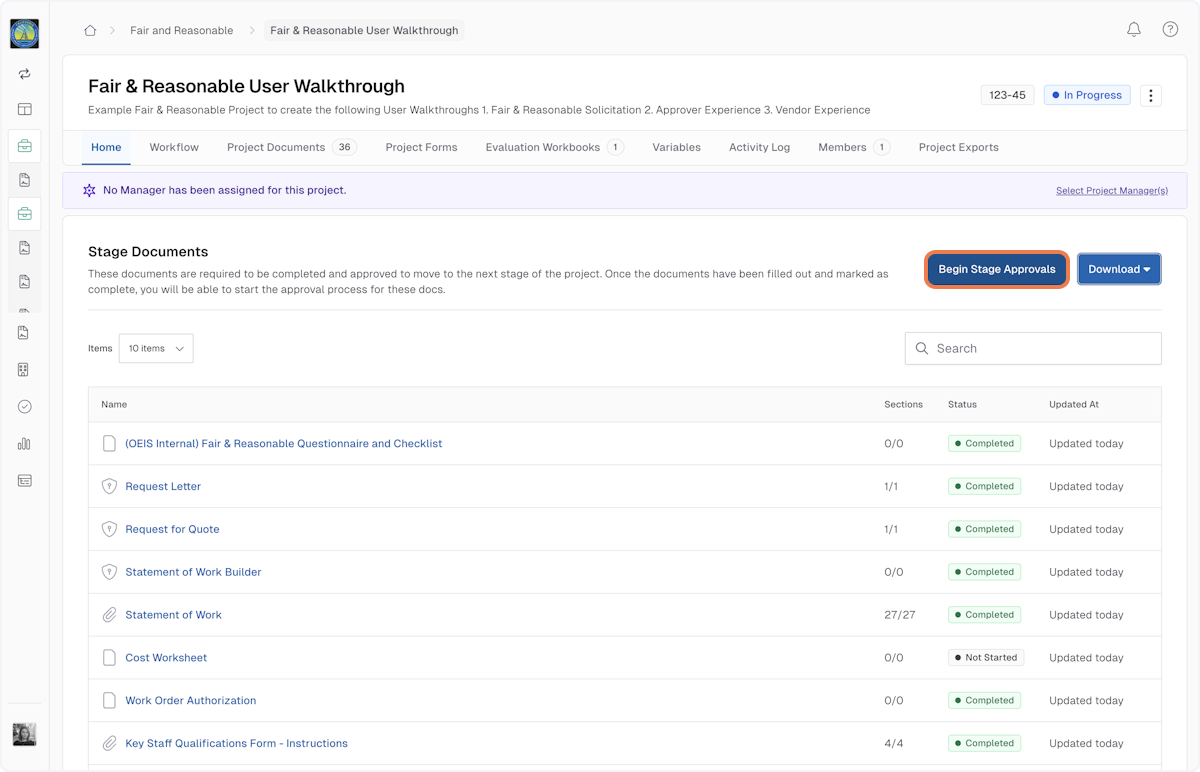
12. Click on Begin Stage Approvals
This will kickstart the approval process where you can configure the approval settings and add an approver to your workflow.
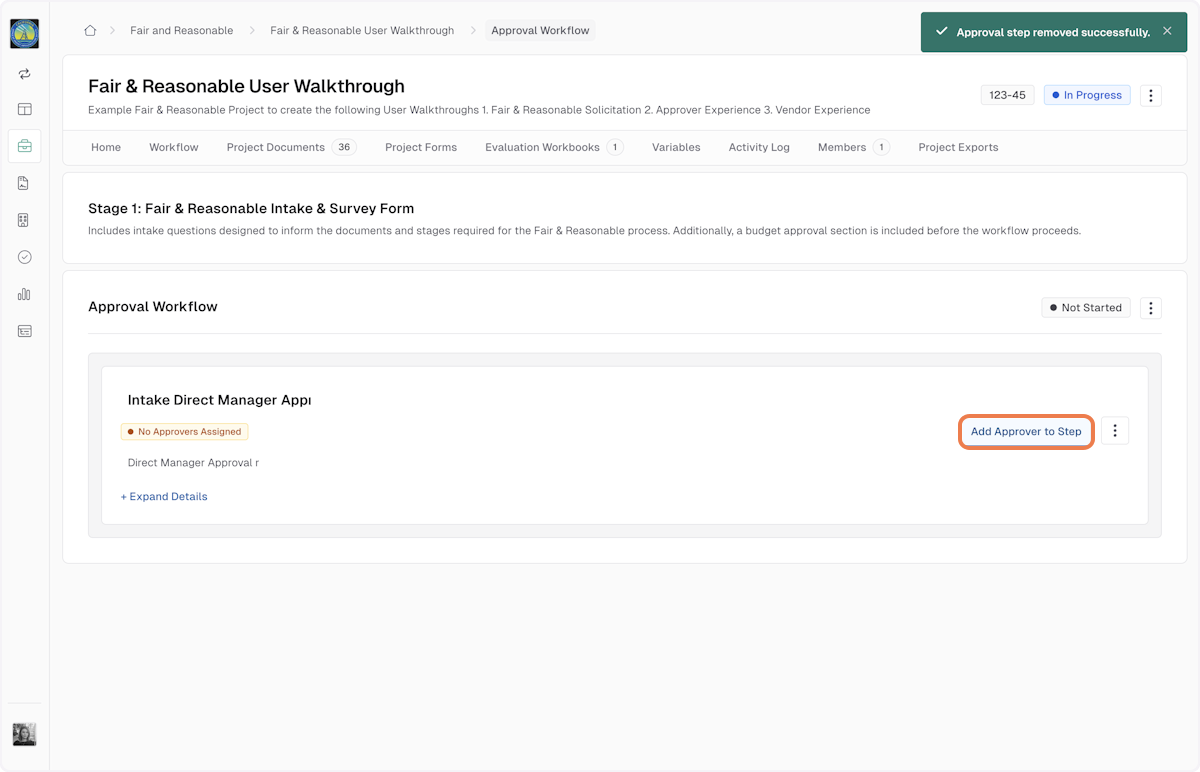
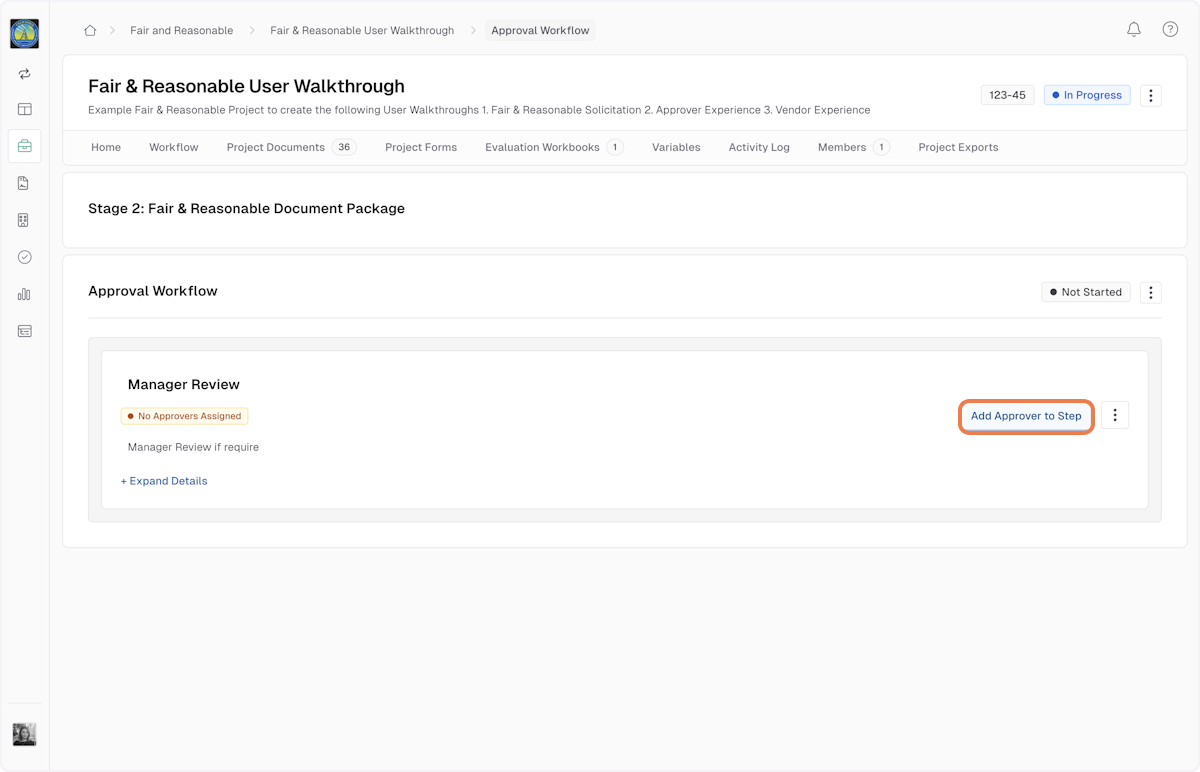
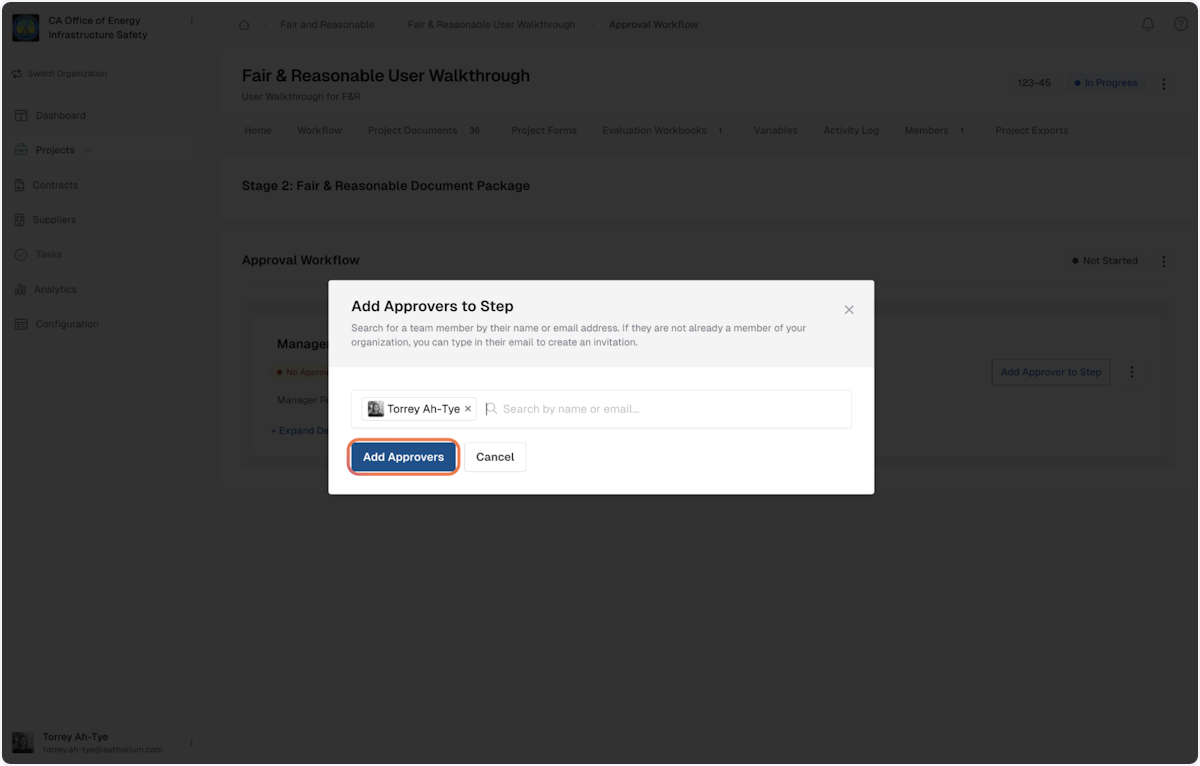
13. Review the Approval Workflow and click on Add Approver to Step
Note options to customize the content that requires approval, accessed from the kabob menu on the right-hand side, which includes the option to Manage Approvers and Content.
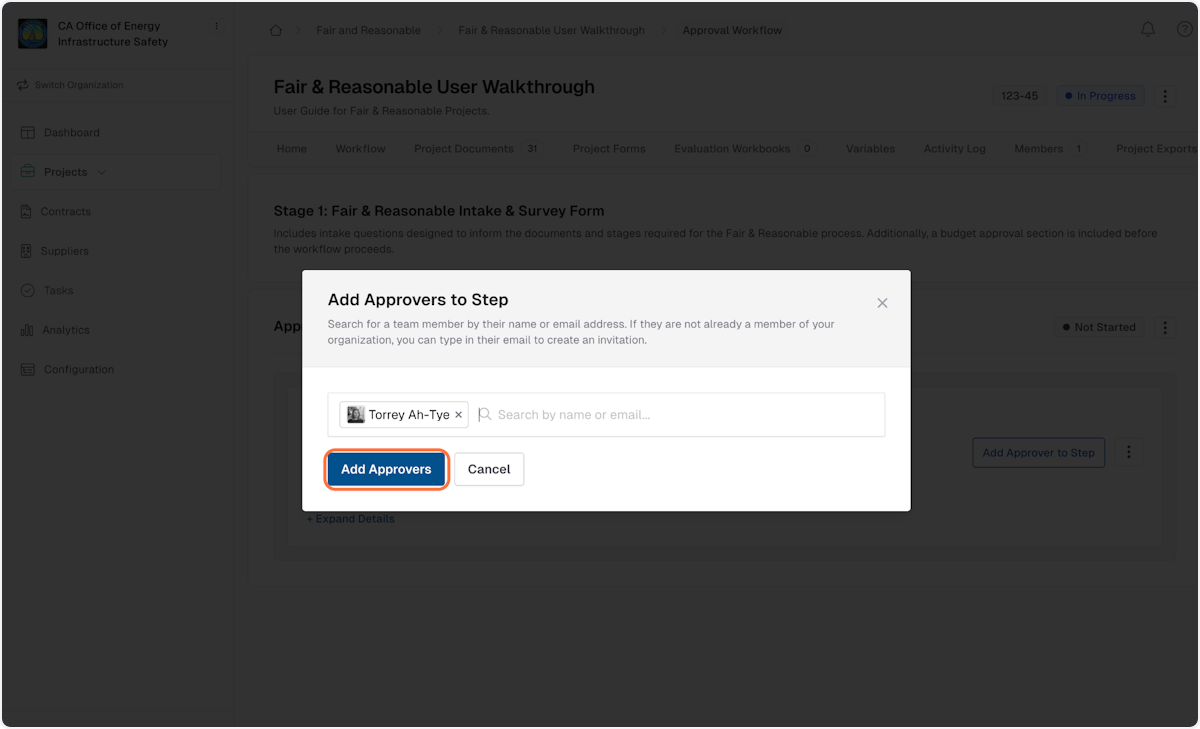
14. Once your approver(s) are selected, click on Add Approvers
Type the name of your approver(s) and select from the dropdown menu.
This step will add your approver(s) to this step, but will not yet notify them to begin their approvals.
15. Click on "Begin Stage Approvals"
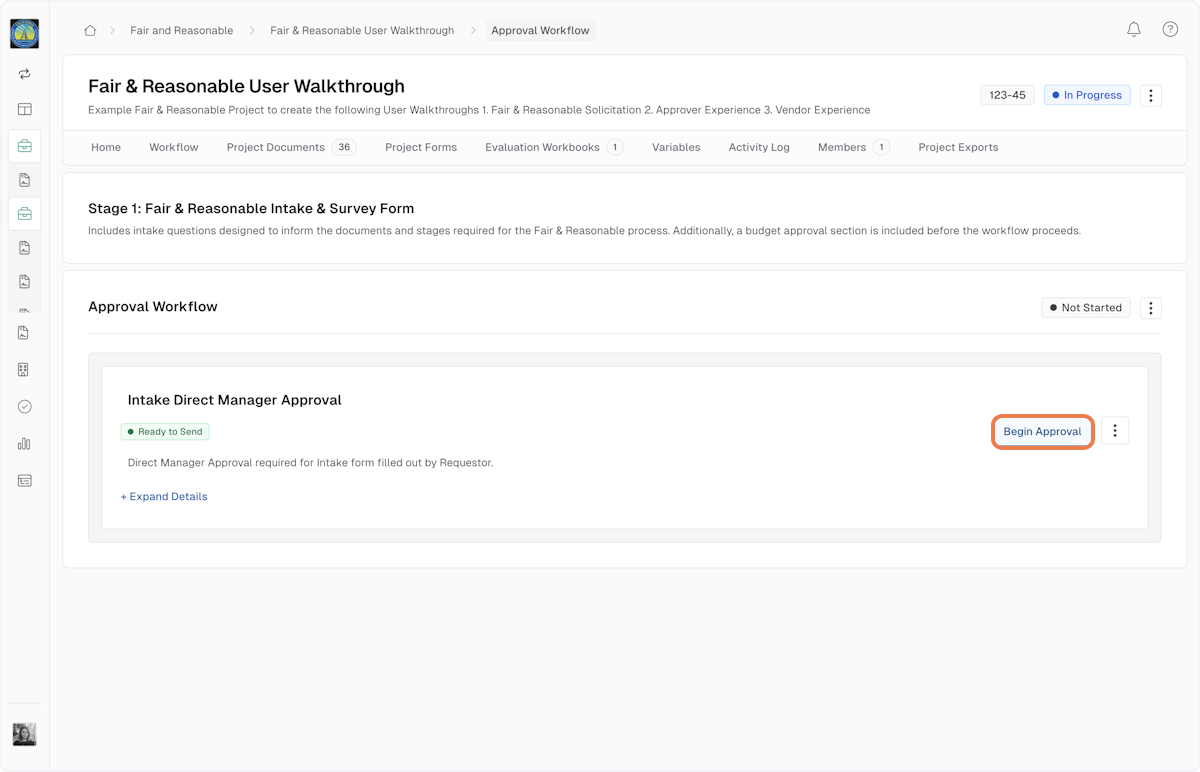
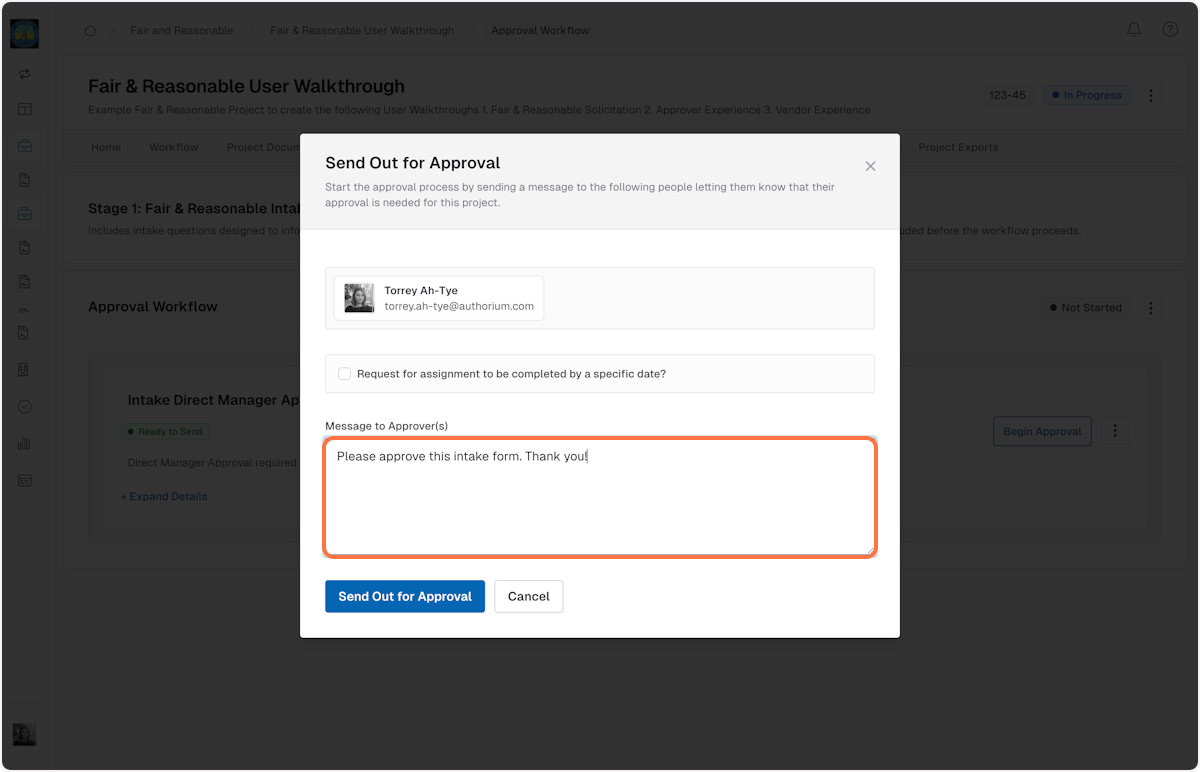
16. Click Send Out for Approval to notify your Approvers
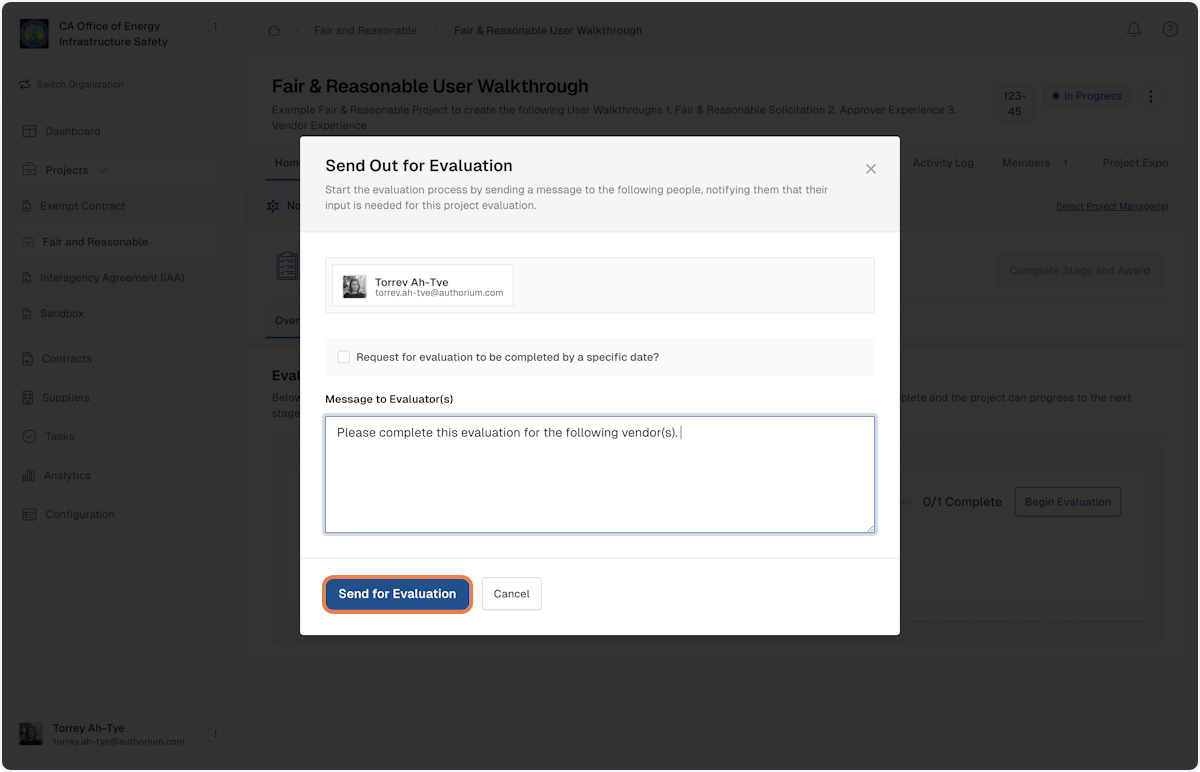
Option to request the approval be completed by a specific date.
Option to add a custom message with the approval request.
17. (Approver) The Approver will receive an email notification
The email will clearly state the name of the step requiring approval
Any custom message added will be displayed in the body of the email.
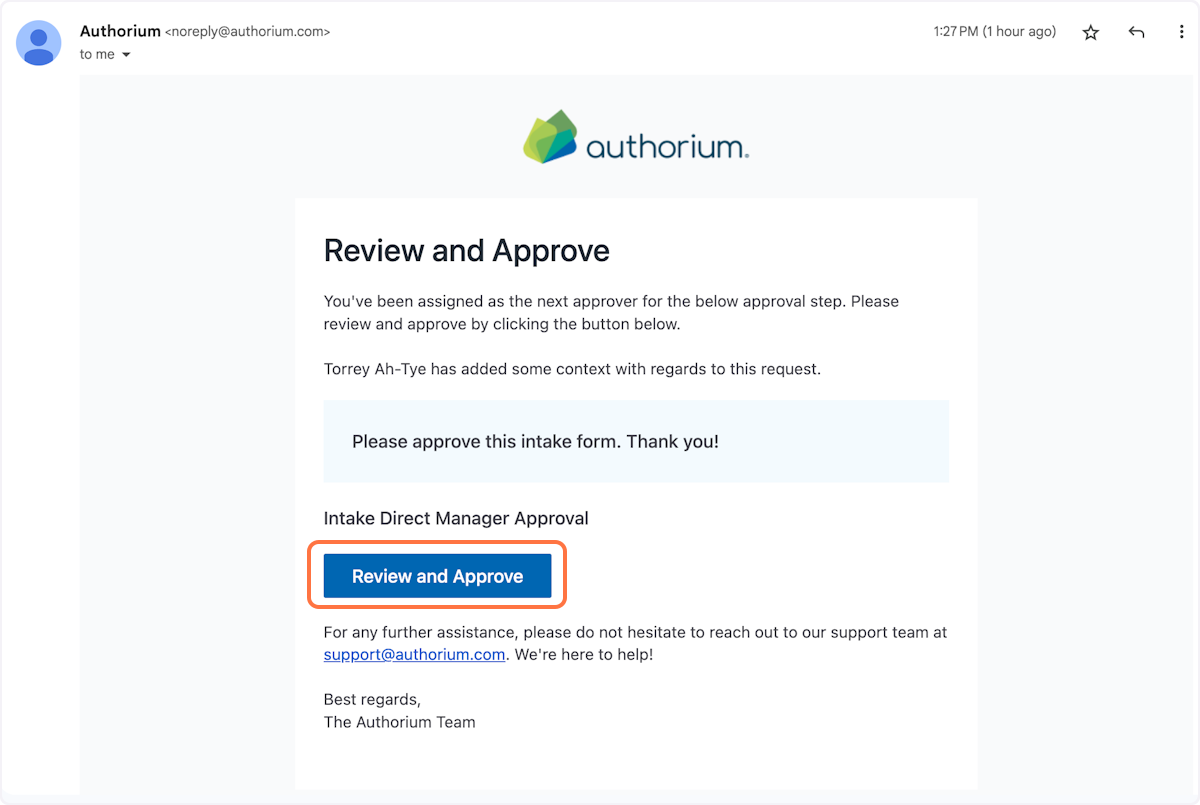
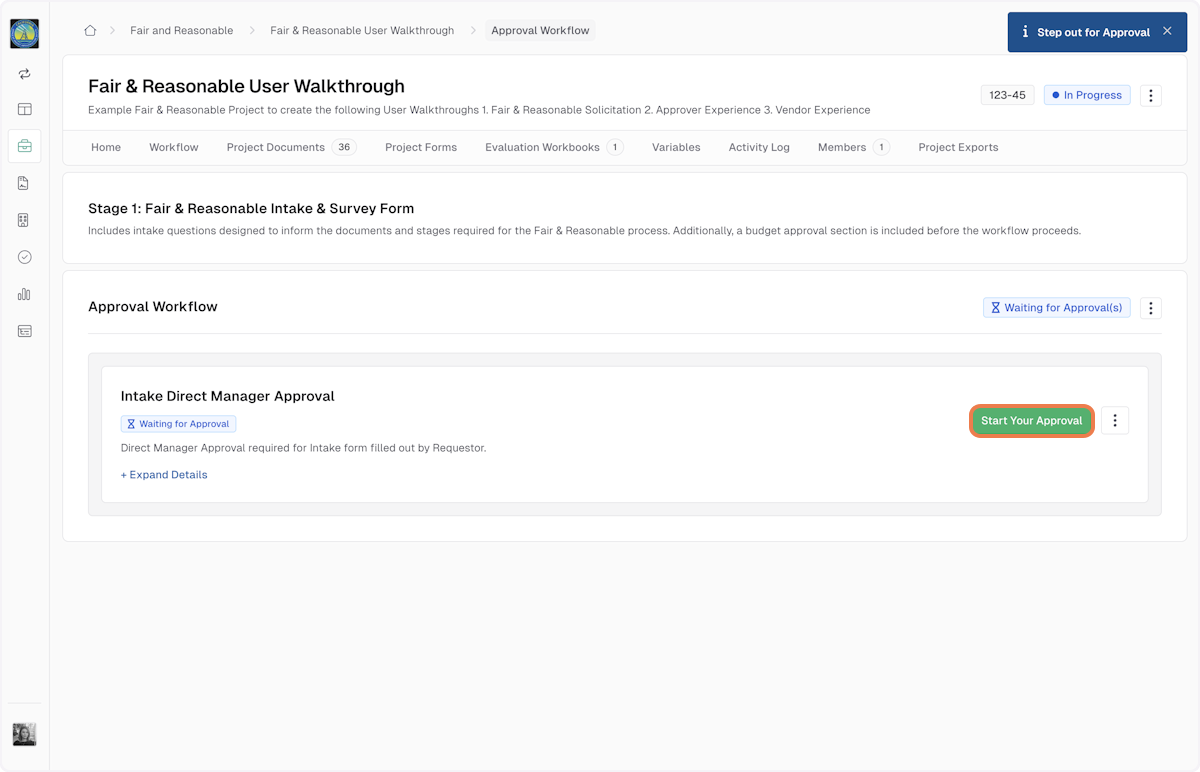
18. (Approver) Click on Start Your Approval
Approvers review and approve the intake submission.
After approval, ownership is transferred to the next stakeholder in the workflow (ie: a procurement analyst for document package creation).
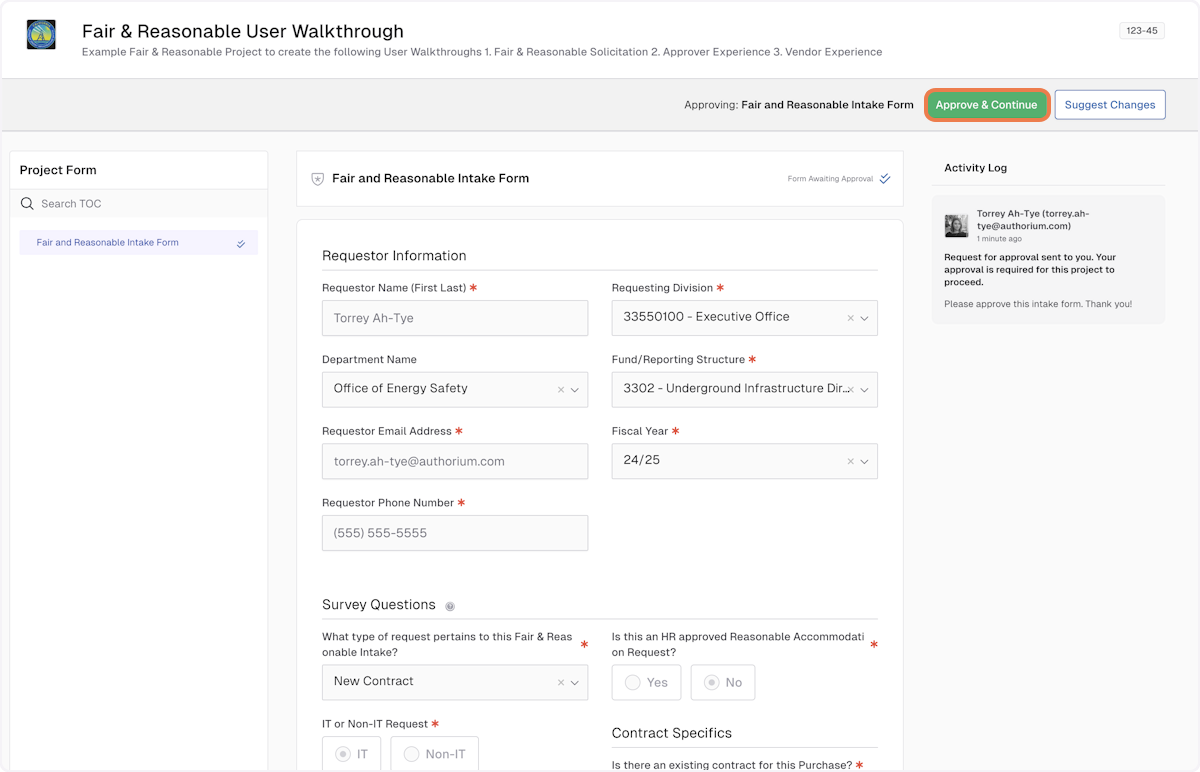
19. (Approver) Click on Approve & Continue
Option to suggest changes before completing the approval request.
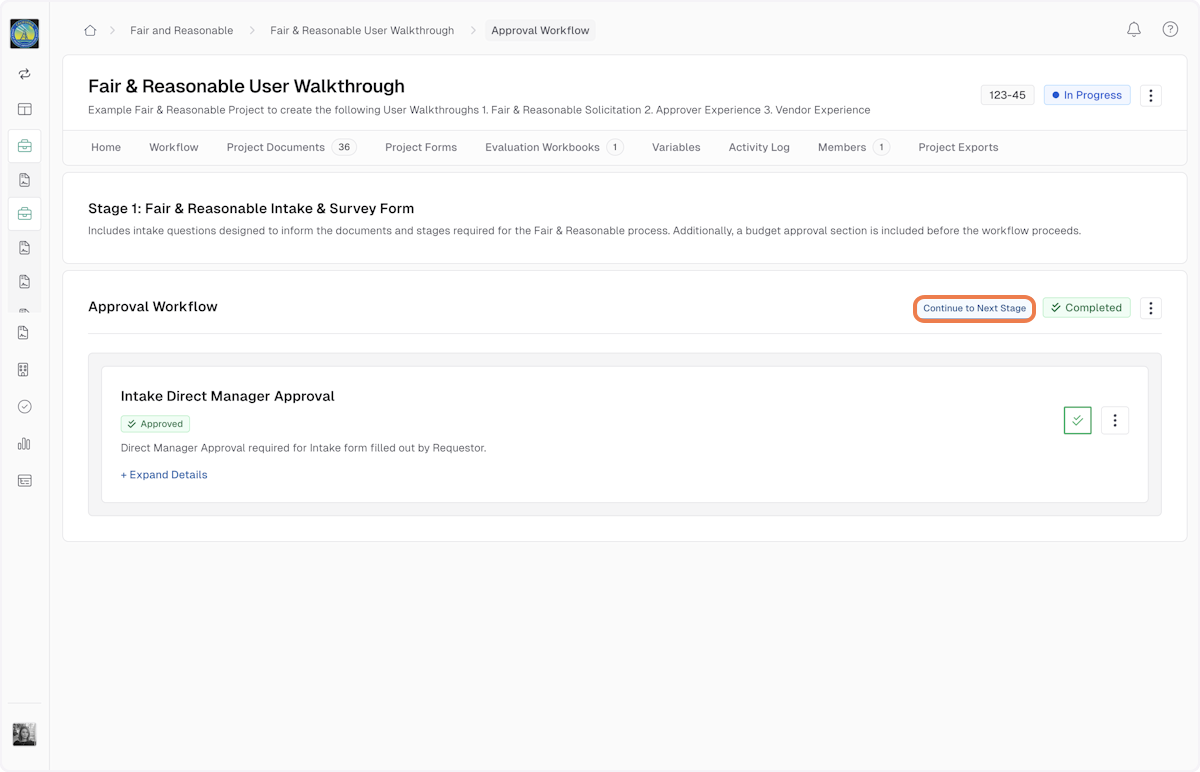
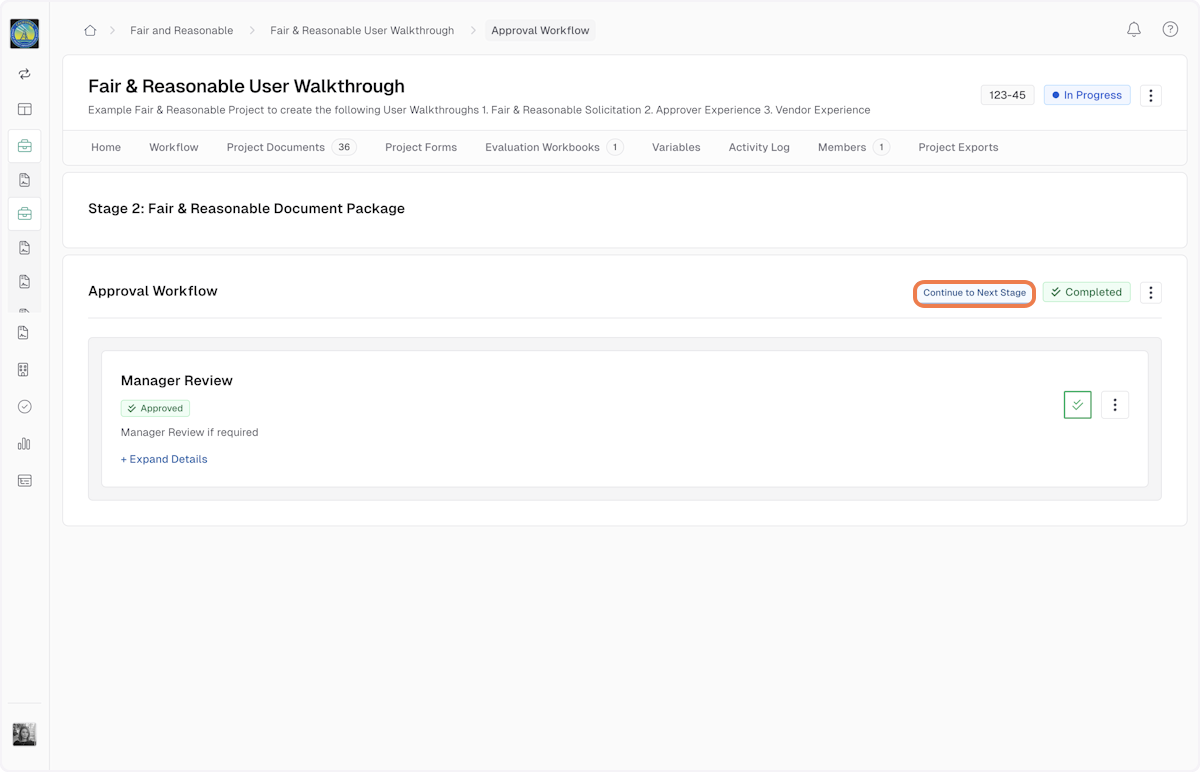
20. Click on Continue to Next Stage
Once the Approver has completed the Approval, the Project Workflow will show the Workflow as Completed.
Document Package and Setting Solicitation Terms
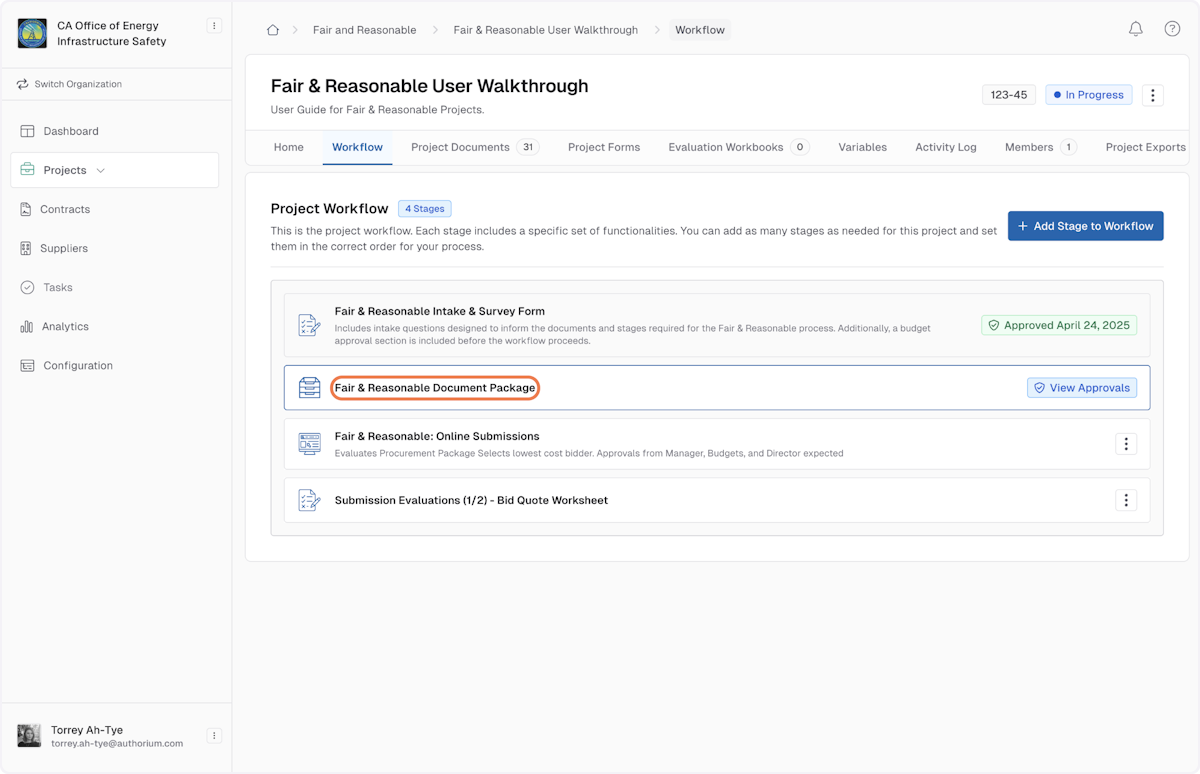
21. From the Workflow, Click on Fair & Reasonable Document Package
Begin configuring the document package.
Attach necessary documents (optional, based on use).
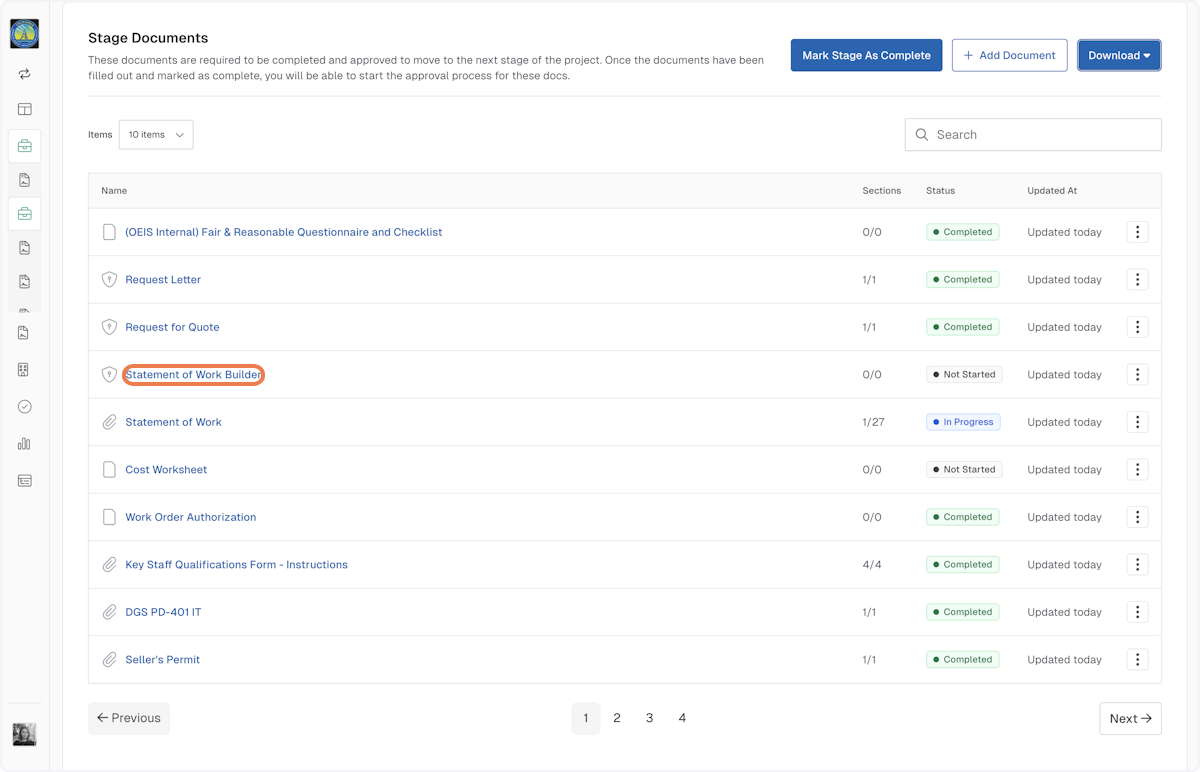
22. Click on Statement of Work Builder
Complete the SOW Builder Form:
Includes dynamic fields (e.g., term extension, hours of access).
Upon save/submit, data flows into the formal Statement of Work document.
Option to:
Use the SOW builder.
Modify or bypass variables manually (advanced users).
23. Enter any applicable information to the Contract Term
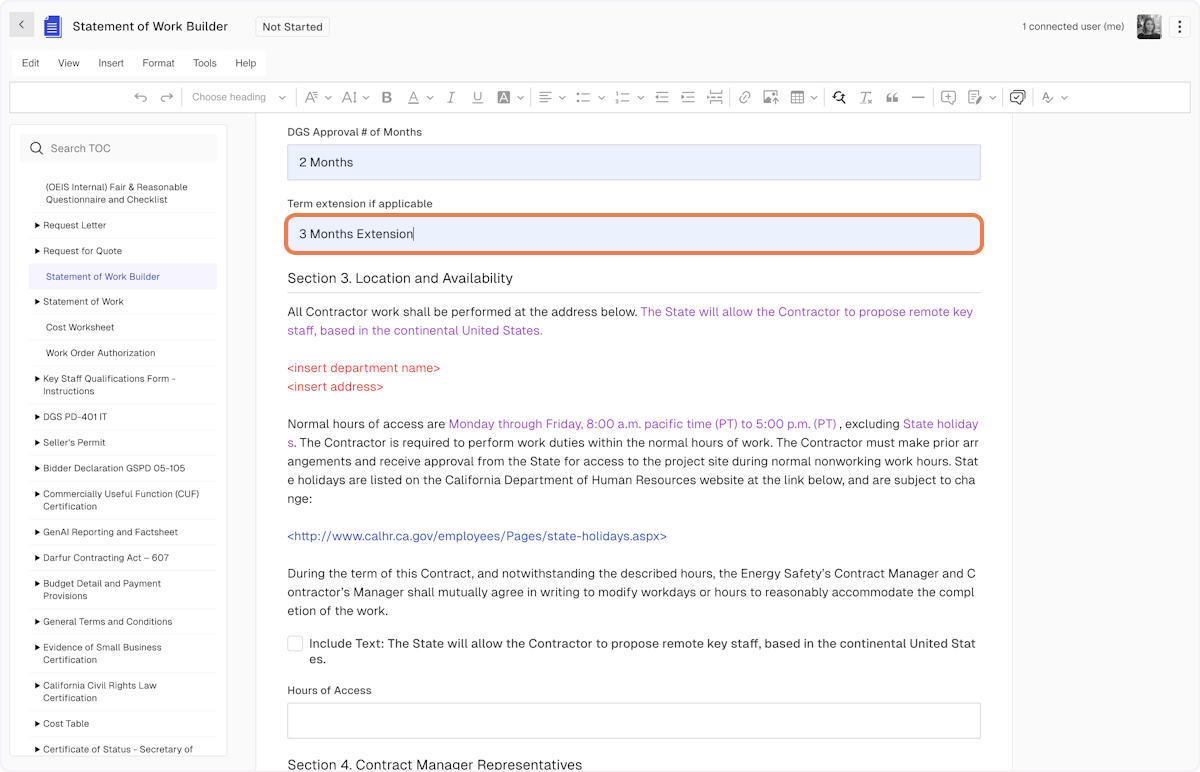
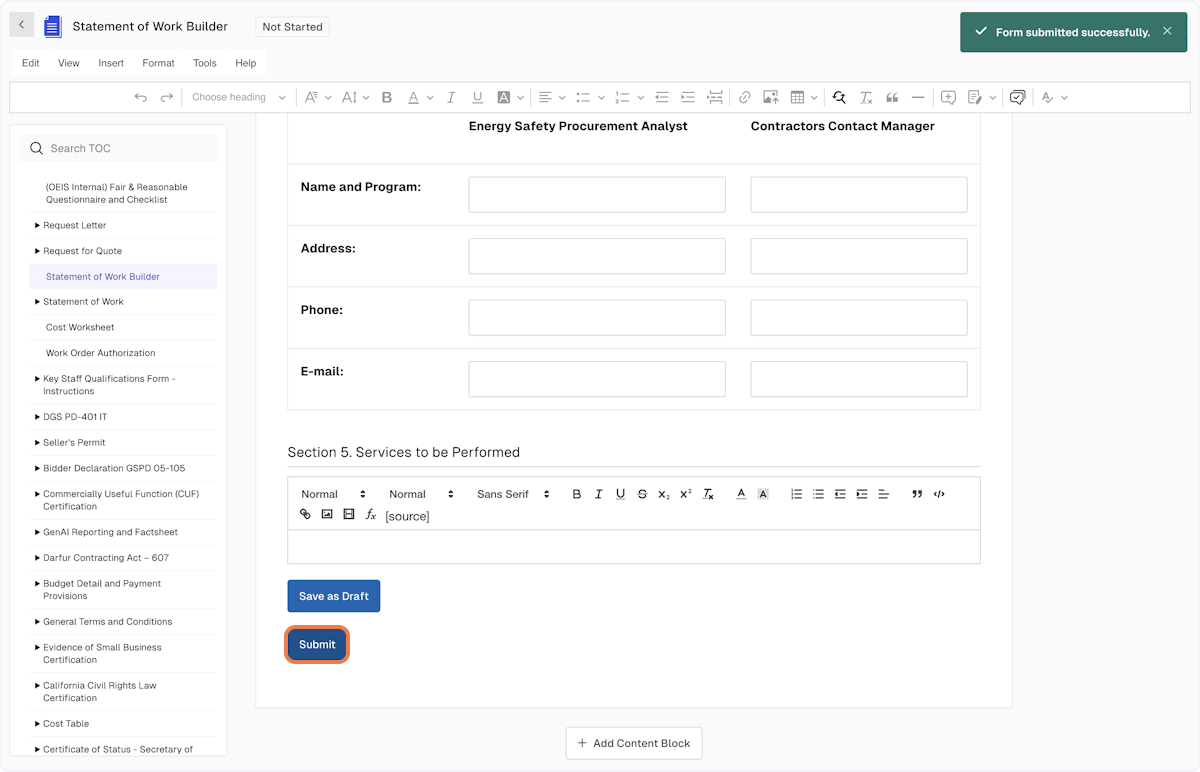
24. Click Submit once the information is complete
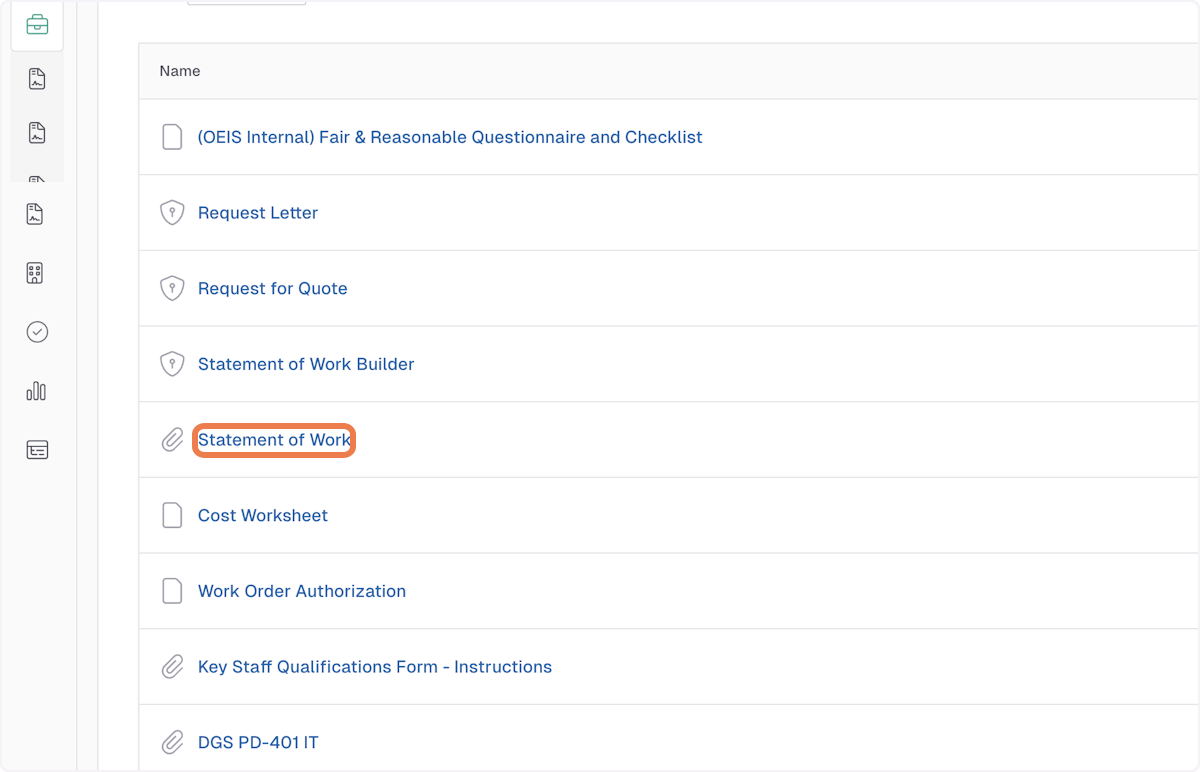
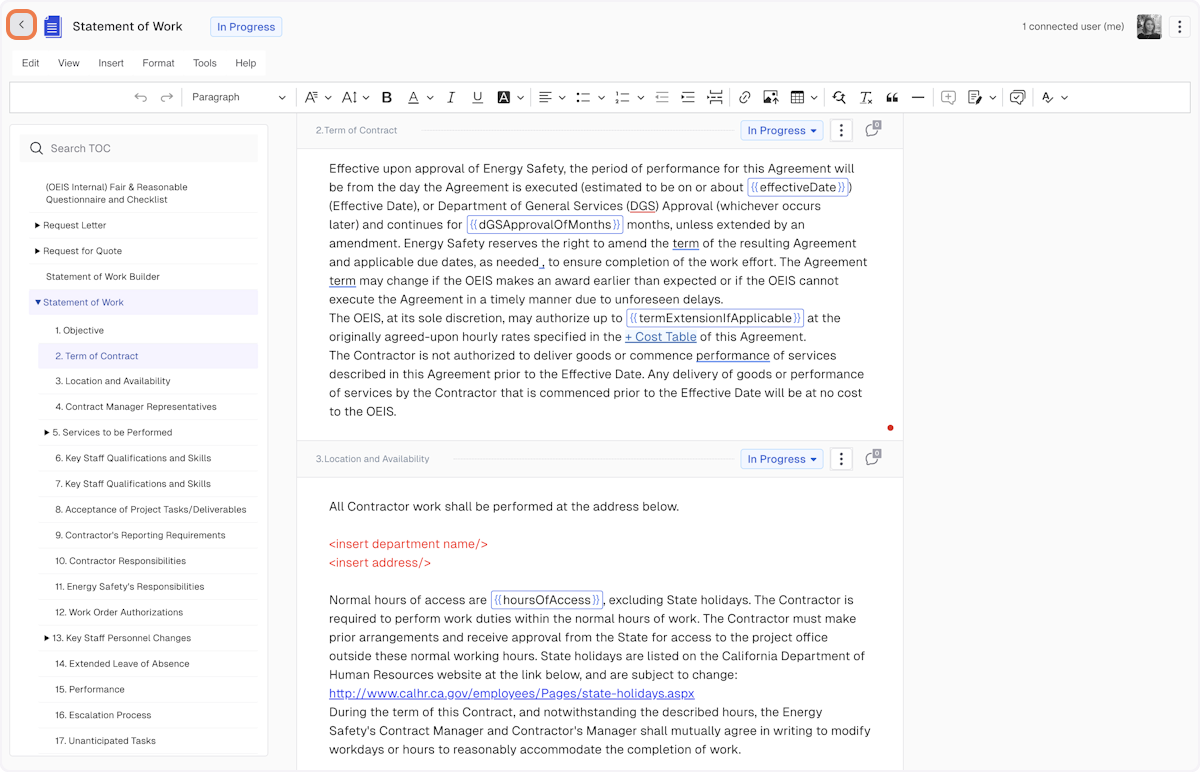
25. Click on Statement of Work
26. Change the Stage to Complete
27. Complete the Document Stage by repeating for all documents
Once documents are finalized, mark them as complete.
Proceed to manager and procurement official approvals:
Reviewer(s) approve SOW Builder and SOW.
Other documents optional to approve based on relevance.
28. Mark the Stage Documents as Complete
Set your notification settings and Confirm & Continue
29. Proceed to Stage Based Approvals
30. Click on Add Approver to Step
31. Search for the Approver you'd like to add to the step
Add Approvers to Confirm
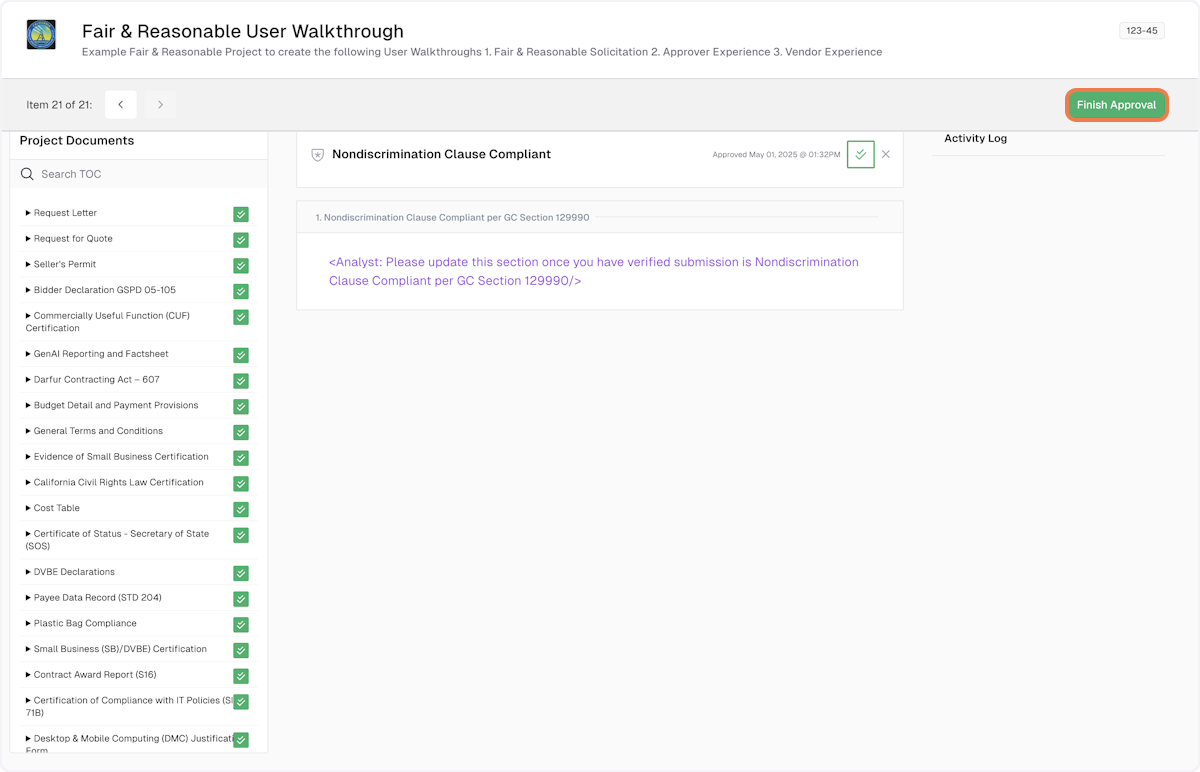
32. (Approver) Once all Project Documents have been approved, click on Finish Approval
Note: The approval workflow is similar to the actions shown in steps 17-19 which can be referenced above.
Set the Solicitation Terms
33. Once the approval is complete, Click on Continue to Next Stage
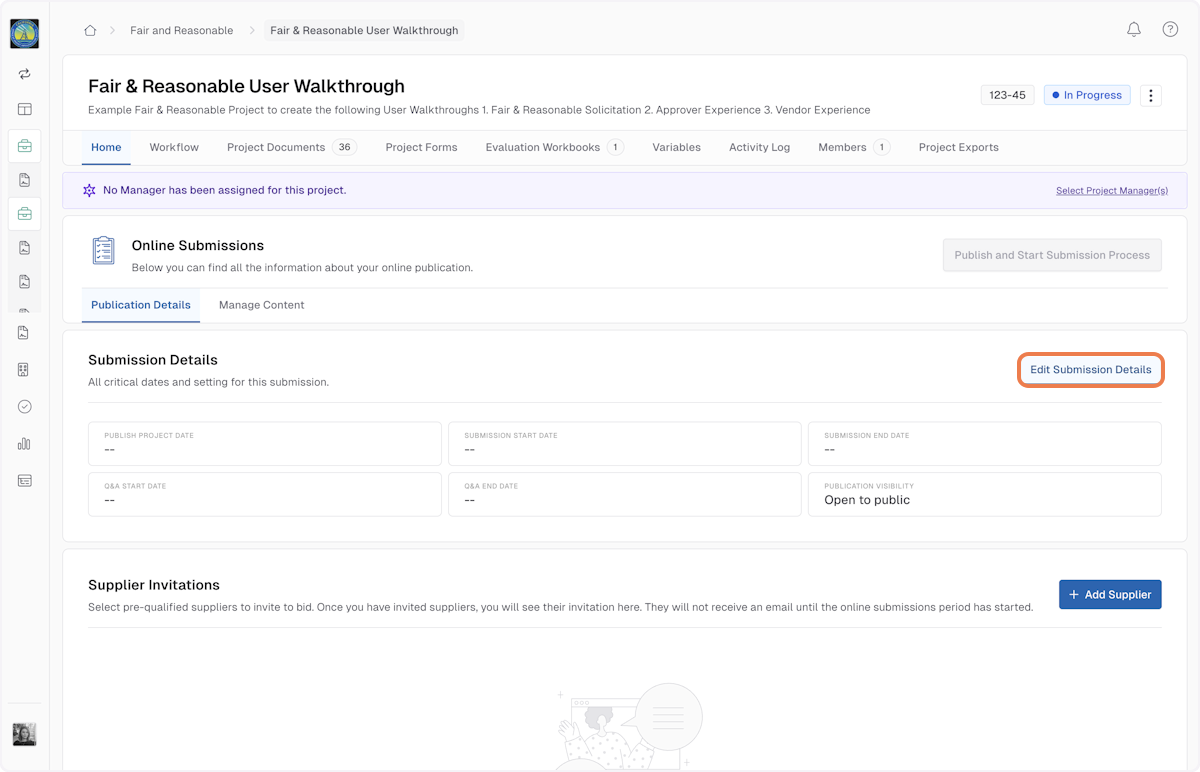
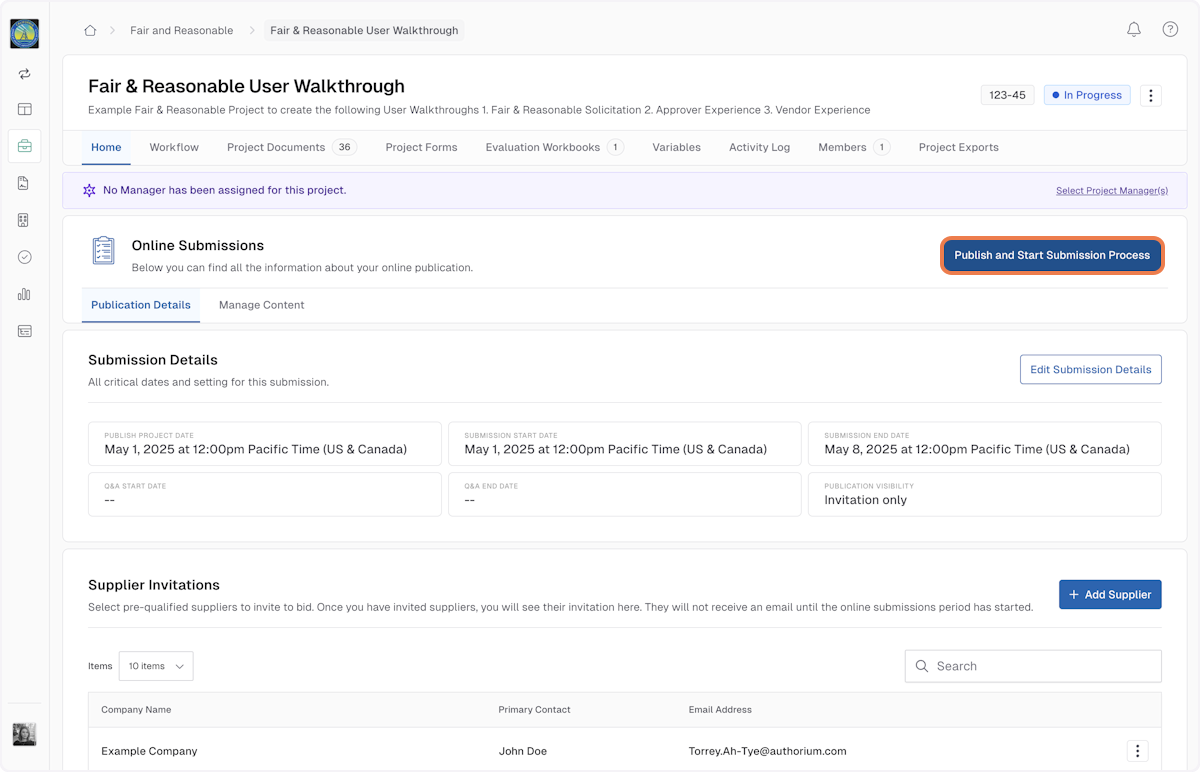
34. Set Up Online Submissions: From the Project Home, Click on Edit Submission Details
Now that your Fair and Reasonable Solicitation is set up and approved, you may configure the submission details to set the terms of the solicitation for review by prospective vendors.
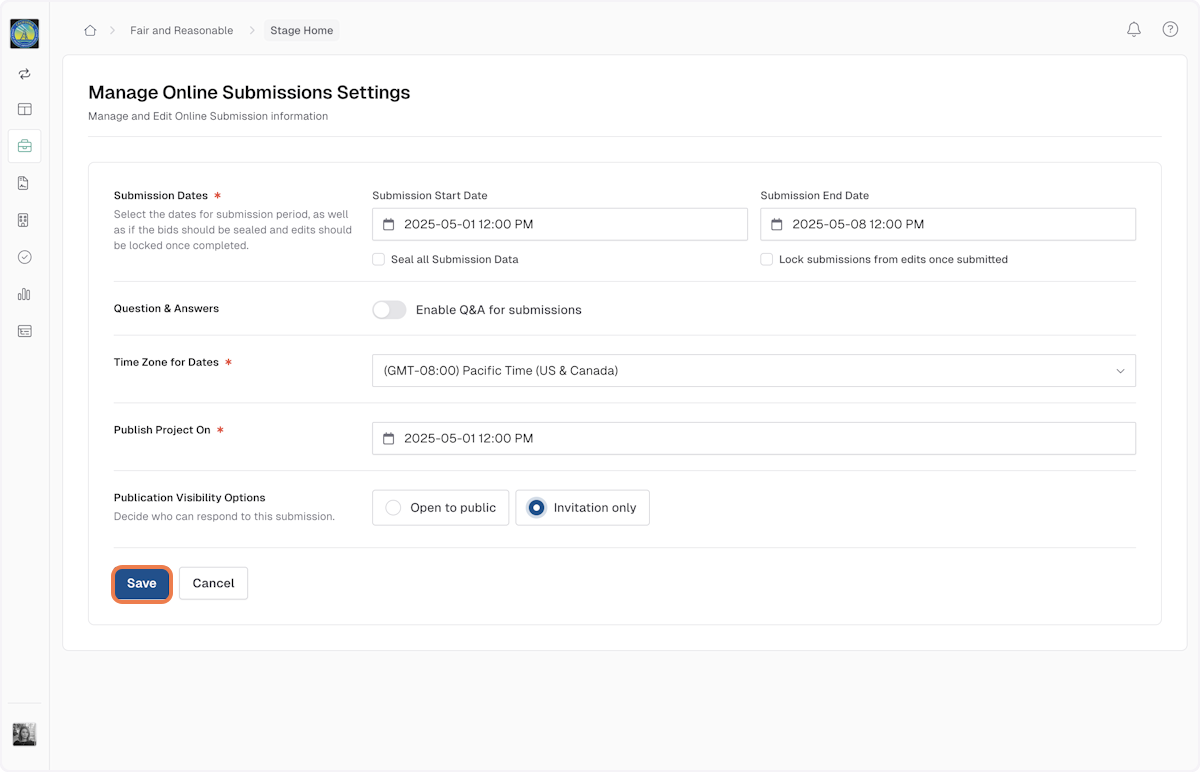
35. Manage Online Submissions Settings and click on Save once complete
Set the submission window (e.g., May 1–30).
Determine if bids should be open to the public or by invitation only.
Publish the submission package.
Vendor Submissions
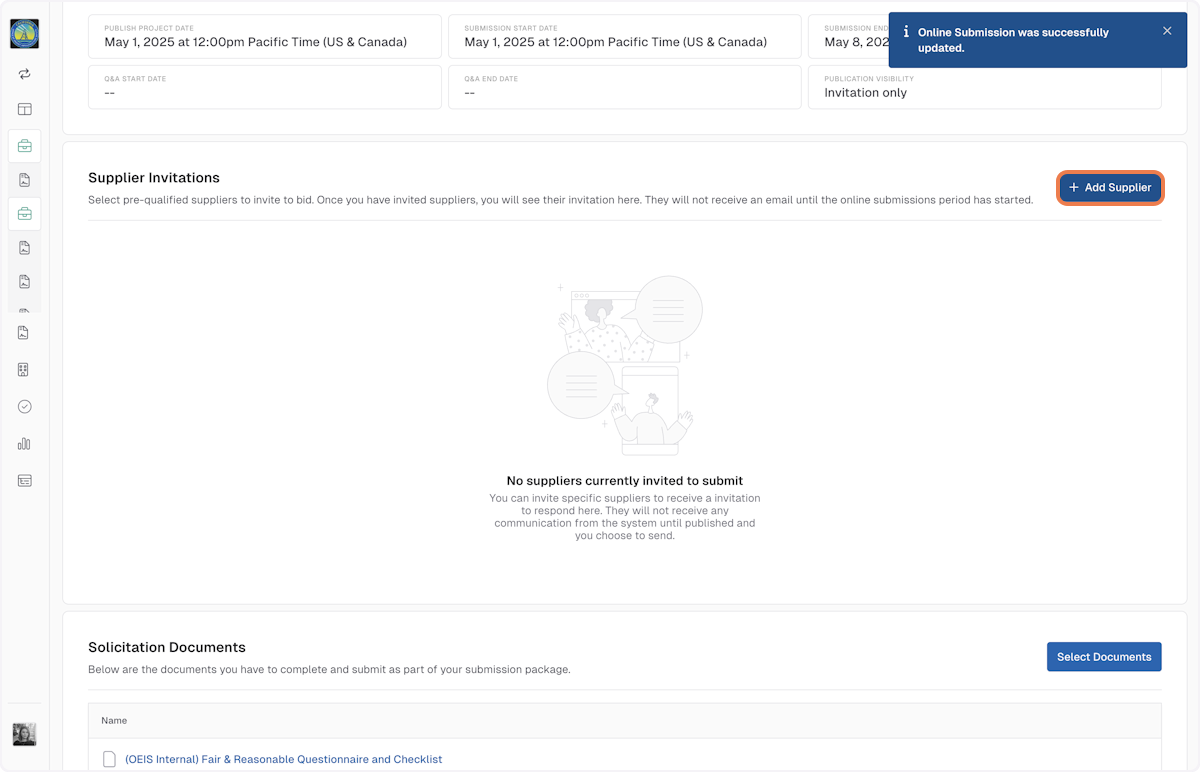
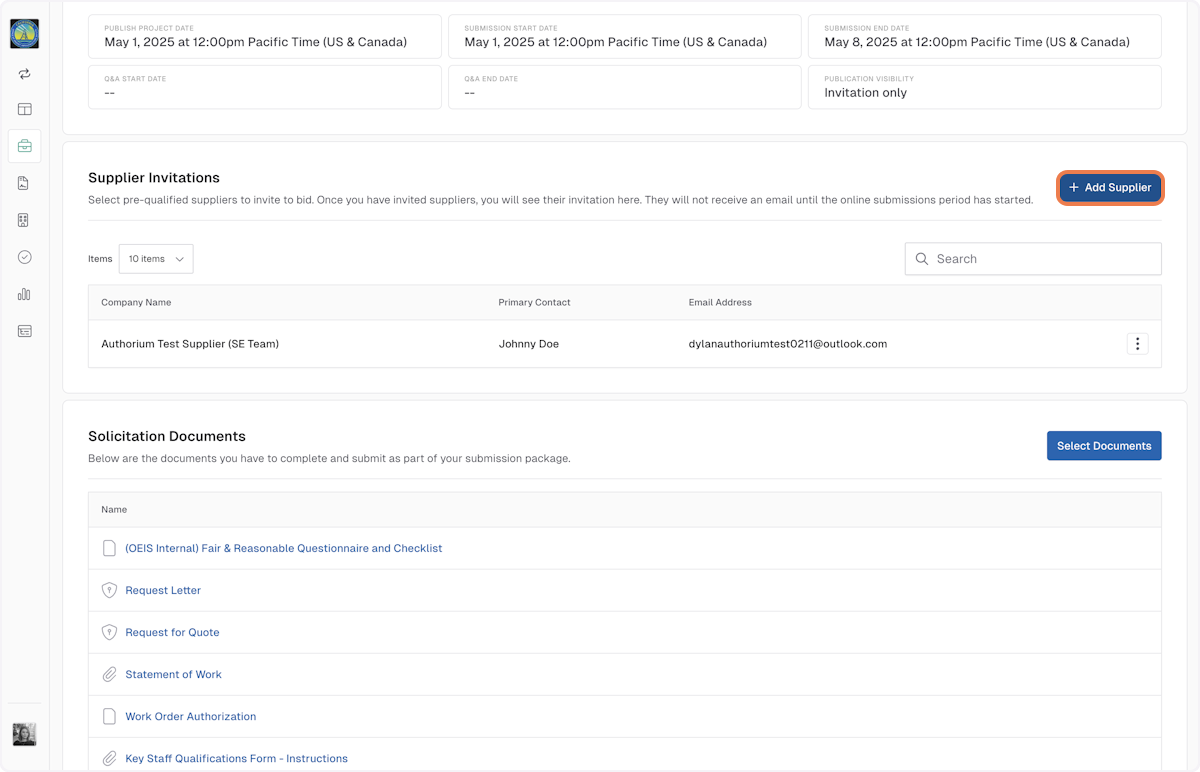
36. Click on +Add Supplier
Now that you've set the terms for the online submissions, it's time to add and invite suppliers to take part in the bid.
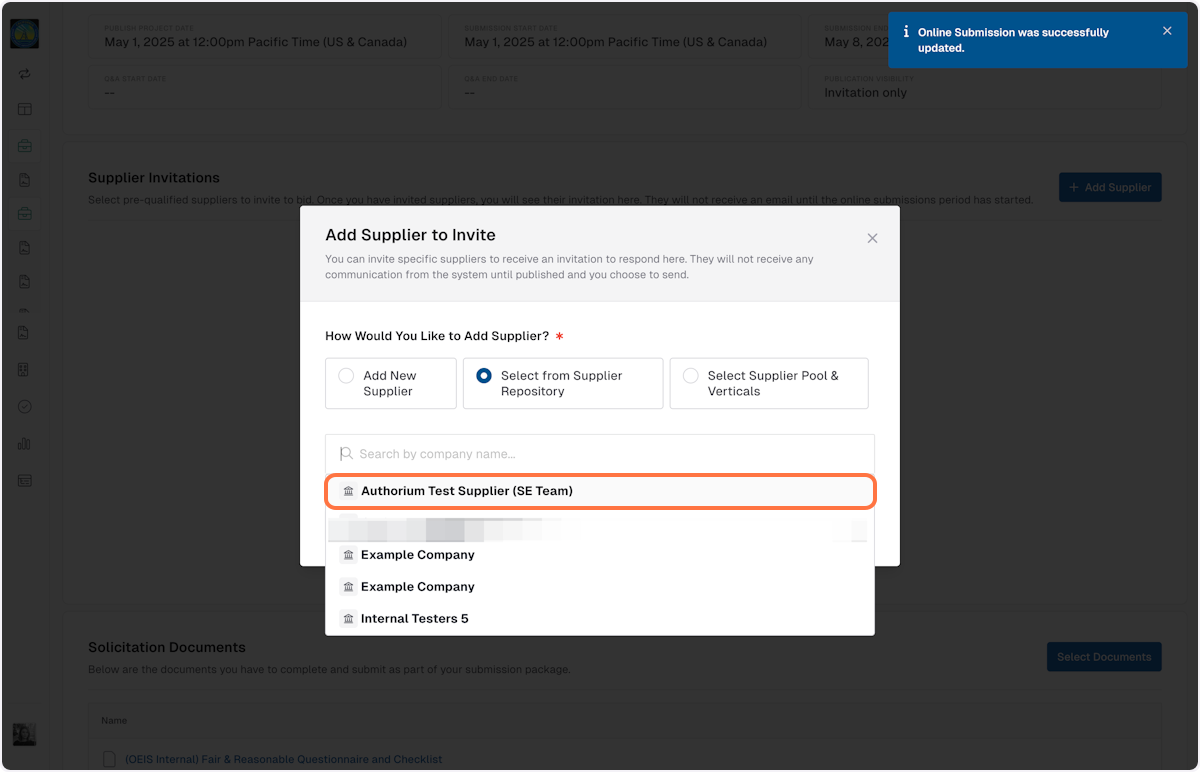
37. Add Suppliers to the invite
You may add a new supplier (Requires name and email address), or select an existing supplier from the supplier repository.
In this example we use our test supplier: Authorium Test Supplier (SE Team)
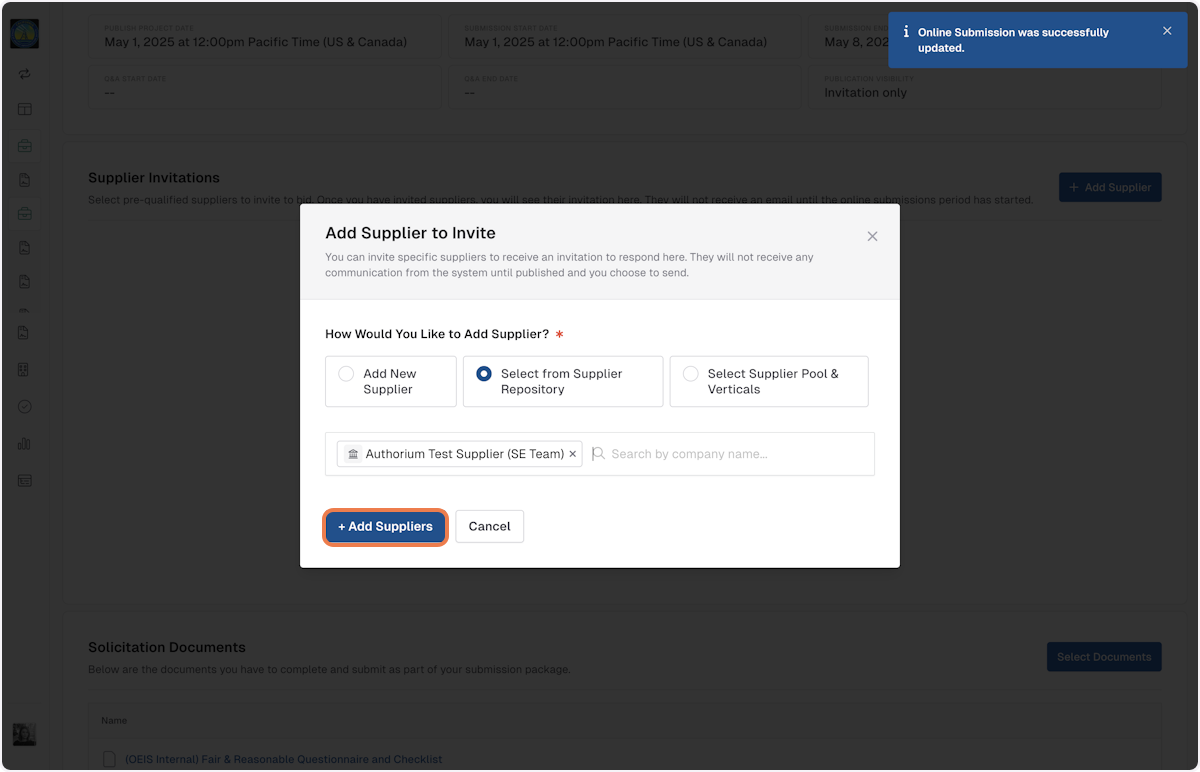
38. Click on + Add Suppliers to finalize your selection
Note: This will not send the invitation out yet, but confirms who will receive the invitation to partake in the bidding once the solicitation is published.
39. Add additional suppliers by clicking on Add Supplier
40. Adding a new supplier
See the following example of how to add a new supplier to the invite

41. Once you've added all suppliers, Click on Publish and Start Submission Process
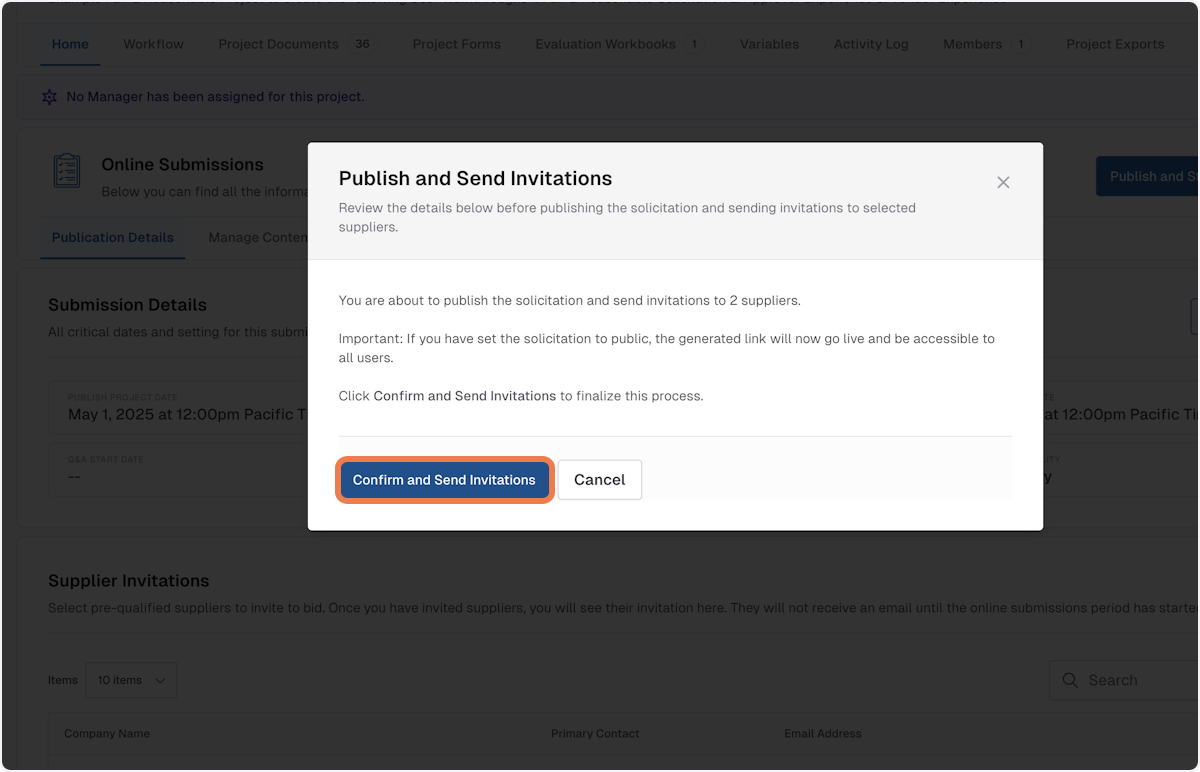
42. Click on Confirm and Send Invitations
If publishing a general link, this step will make it go live.
If inviting suppliers you've added to the solicitation (as shown above), this step will send email notifications inviting them to submit a proposal.
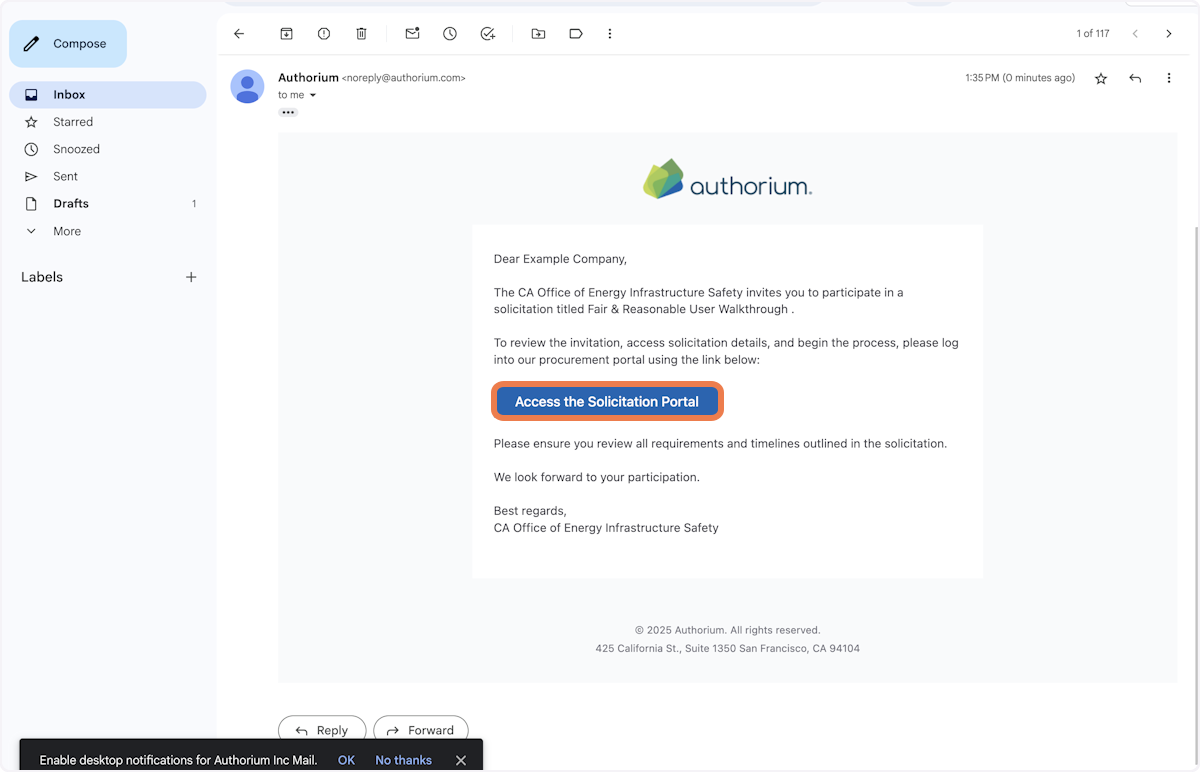
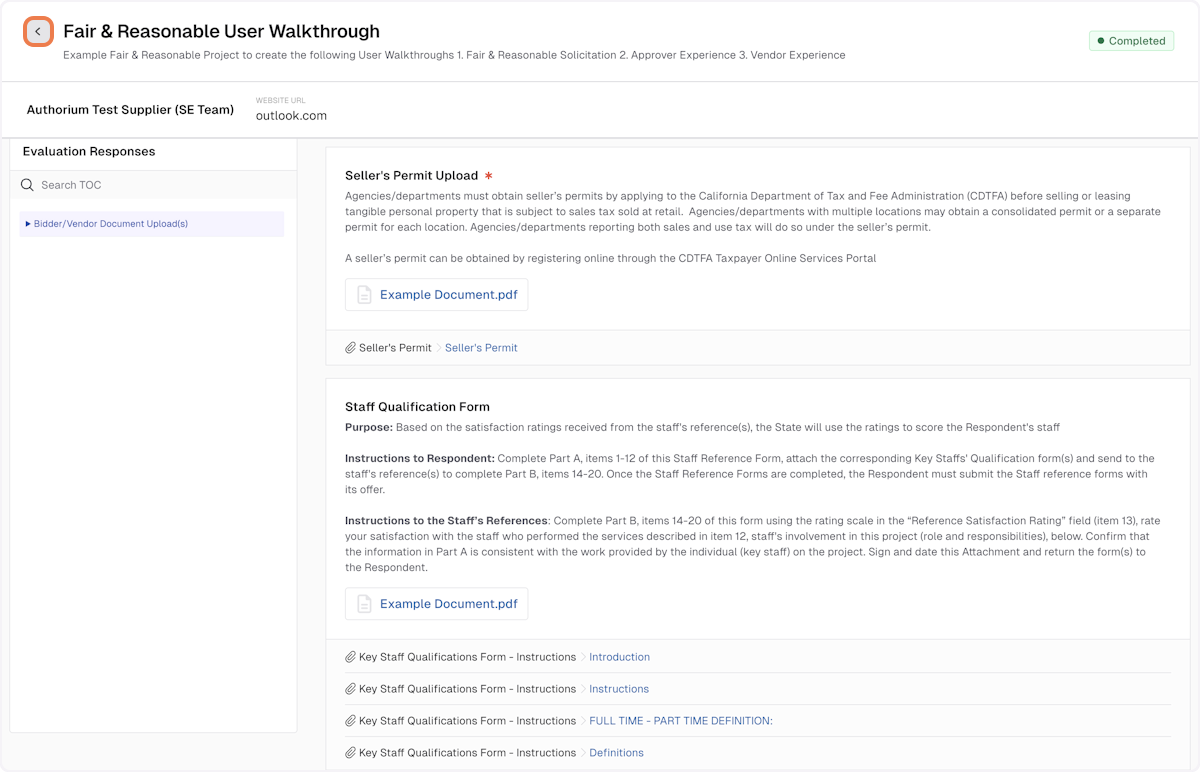
43. (Vendor) Invited vendors will receive an email notification inviting them into the Authorium Portal.
Suppliers receive an invite and will be prompted to log in to submit documentation for their bid.
After submission, the vendor status changes to Completed.
To better understand the vendor experience, refer to the Guide for Vendor Experience for Solicitations in Authorium.
Evaluation & Award
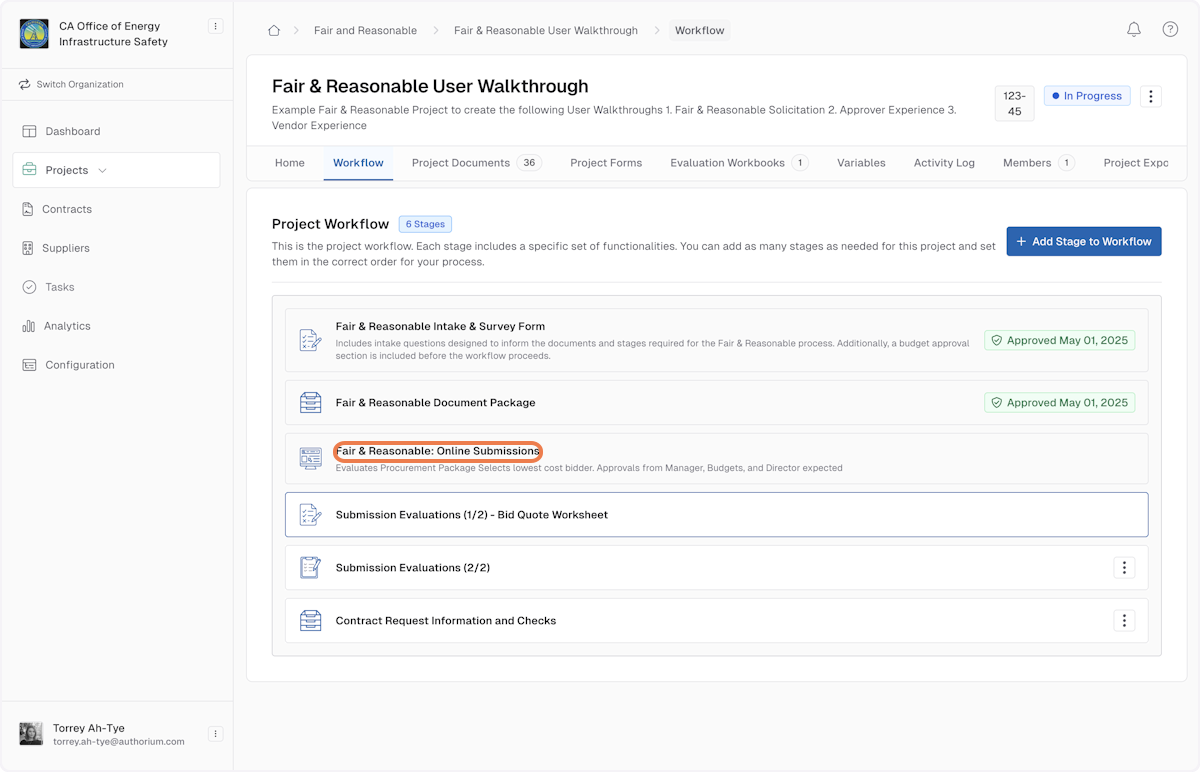
44. Click on Fair & Reasonable: Online Submissions
To monitor active vendor submissions, you may click into the Online Submissions as shown below.
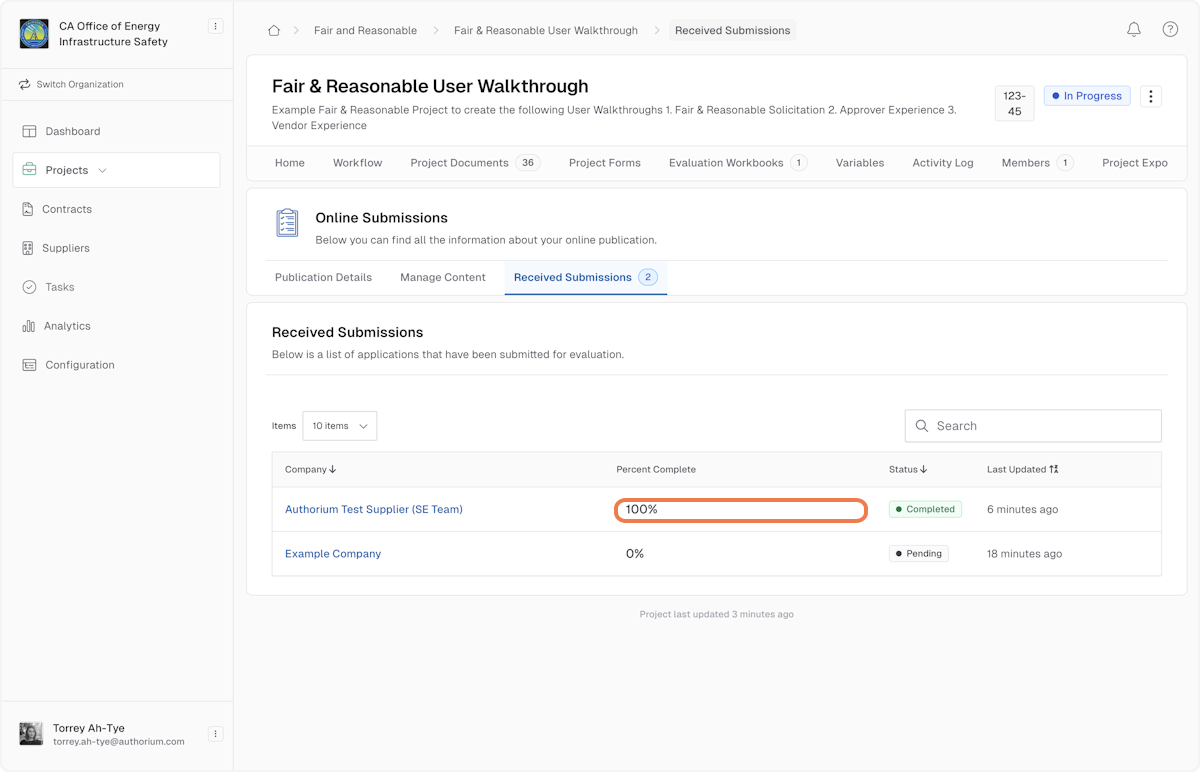
45. Click on Received Submissions
You may use this view to track progress of vendors submitting bids for this solicitation.
Note: Currently, vendors cannot interact with fillable forms in the system (e.g., CUF forms, RFQ sheets). Instead, they must download, complete, and re-upload documents.
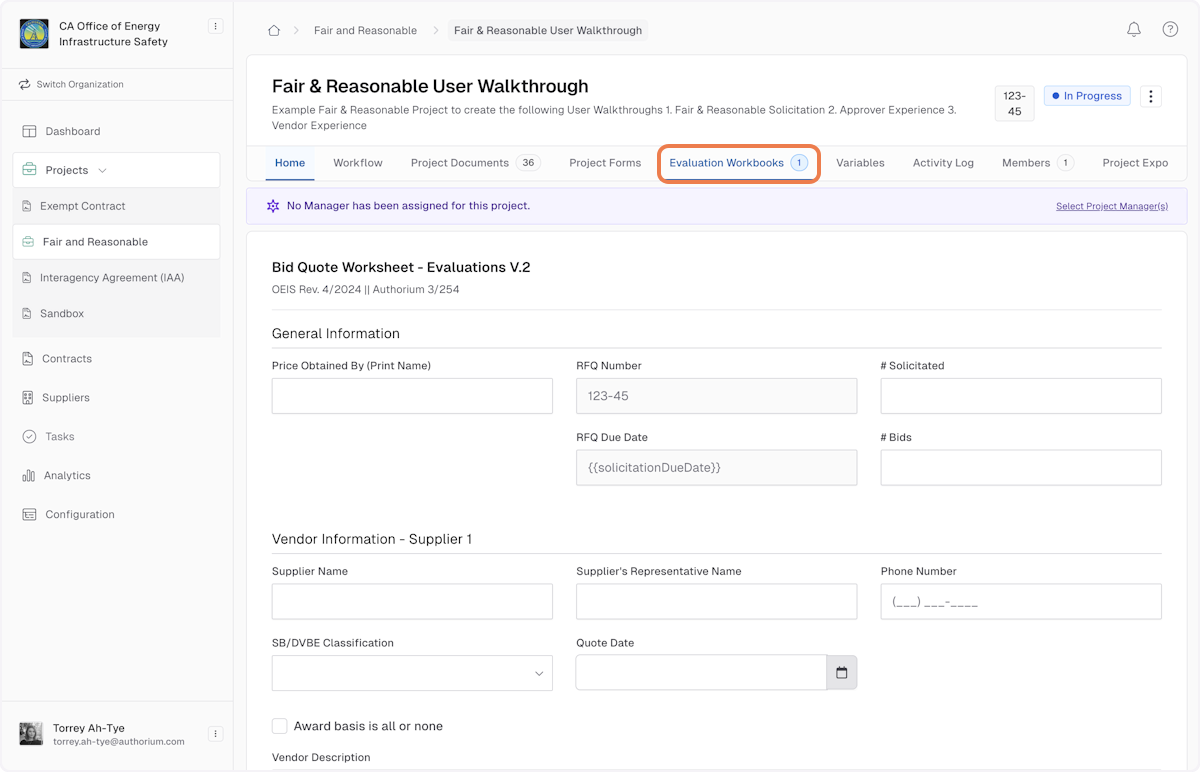
46. To start the Evaluation, click on Evaluation Workbooks from Project Home
Note that evaluations can be initiated as long as one vendor has completed their submissions.
You may add additional vendors as needed.
For Fair & Reasonable workflows, you will likely already know who the winning vendor is.
Note: The evaluation workbook does not currently auto-populate supplier information from online submissions. Users will need to manually input vendor name, rep name, and quotes—even if this was already submitted. This is a current limitation of the platform. Auto-fill functionality may be added in a future update.
47. Feel free to cross reference vendor submissions by opening up the workflow in a new tab.
You may want to open up the Workflow tab in a new browser tab so you may review the vendor information for the purposes of completing this portion.
Note: To make the workflow easier and more familiar, the evaluation process was modeled on the "Bid Quote Worksheet" method used by many teams. While a direct link between vendor-submitted forms and the evaluation workbook is not yet possible, this approach minimizes complexity for users familiar with this format.
48. Finalize Vendor Information sheet or add additional vendors
- Check the box to +Add Additional Supplier Quote to input information for an additional vendor.
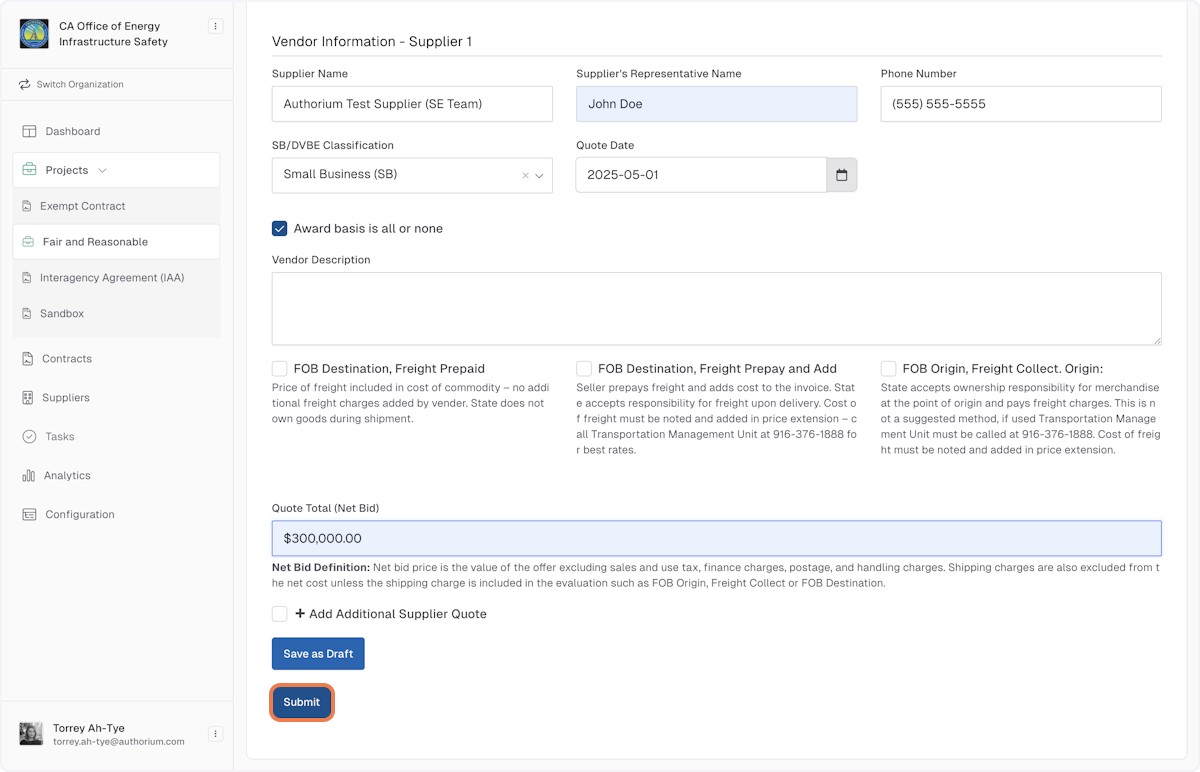
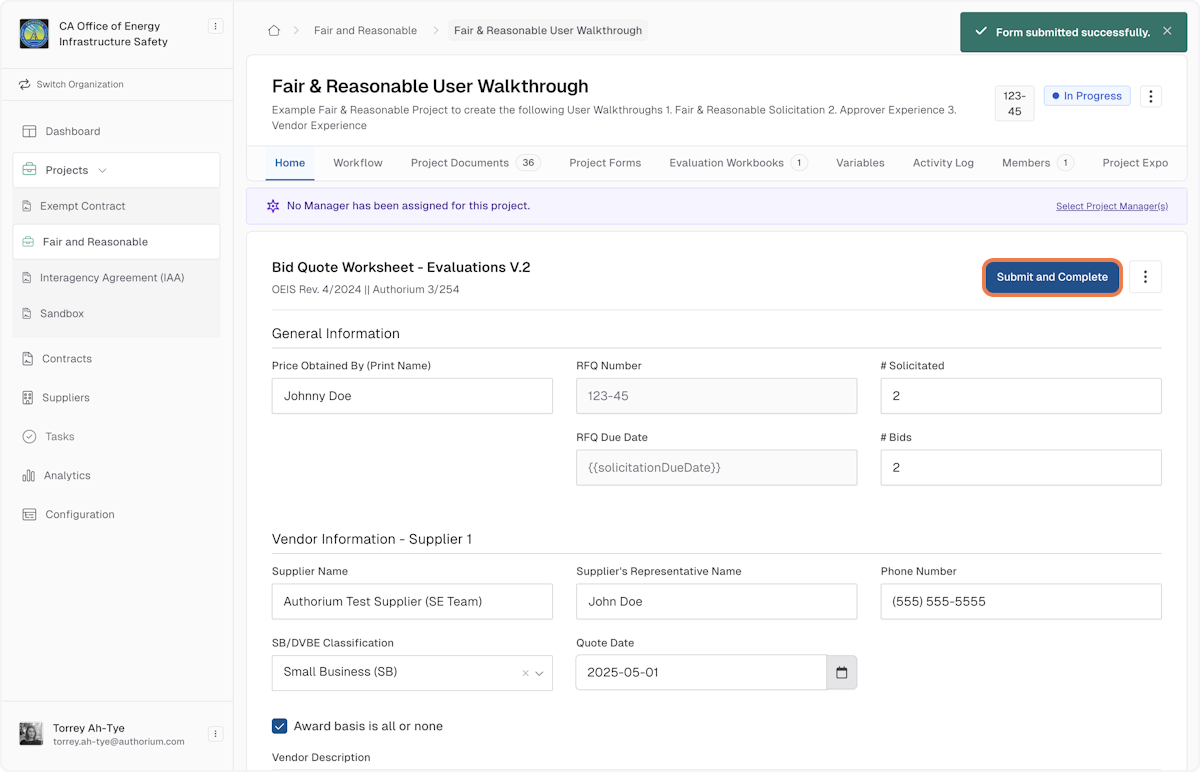
50. One the Bid Quote Worksheet is complete, Click on Submit and Complete
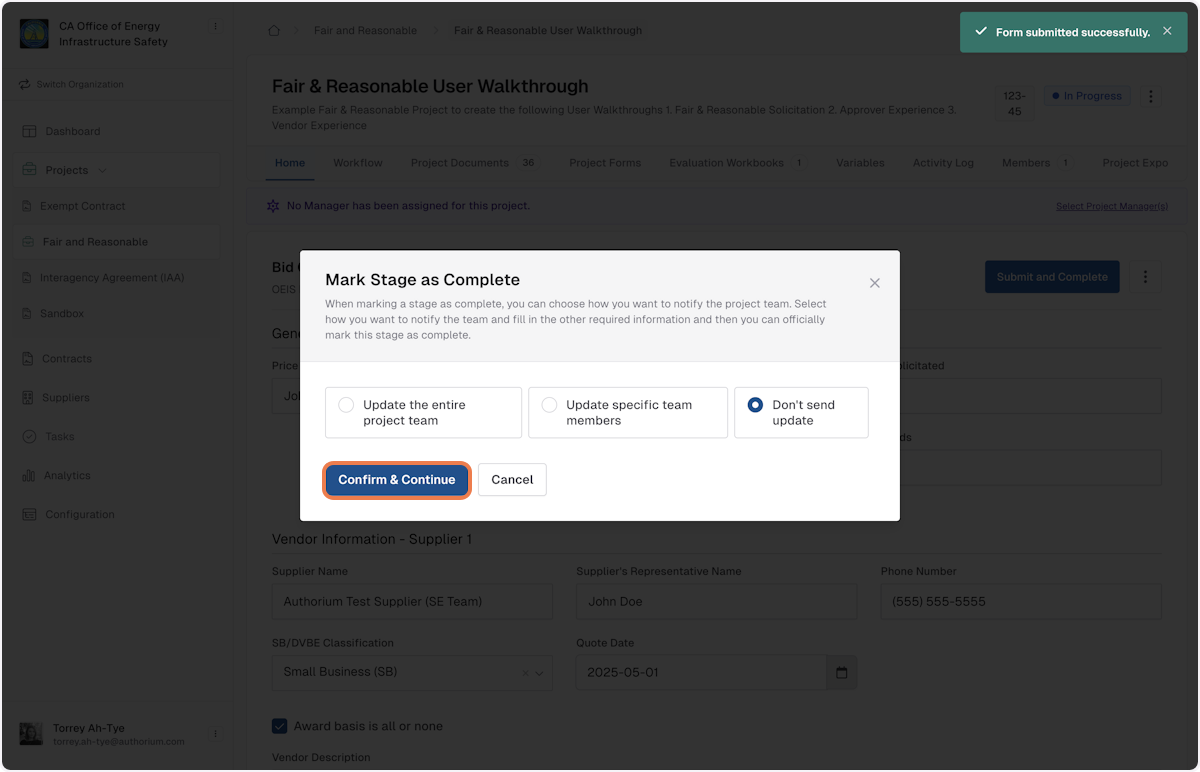
51. Click on Confirm & Continue
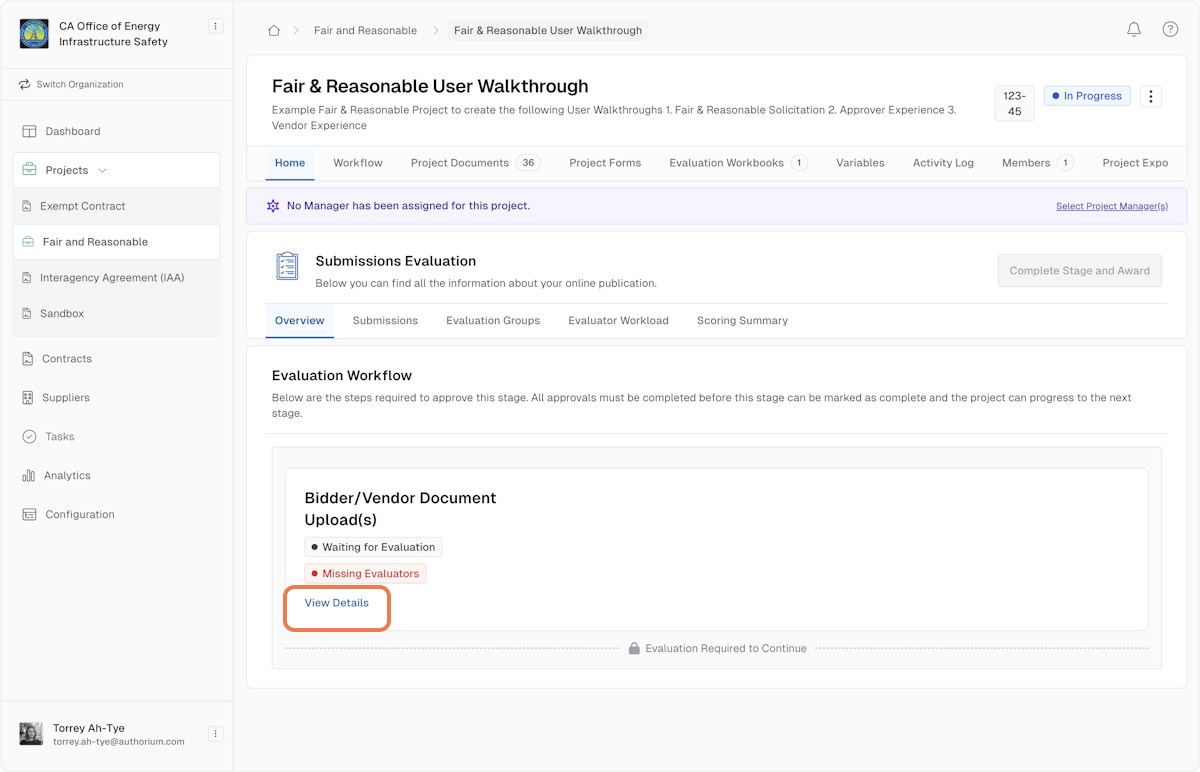
52. From the Project Home, click on View Details
53. Click on Add Evaluator
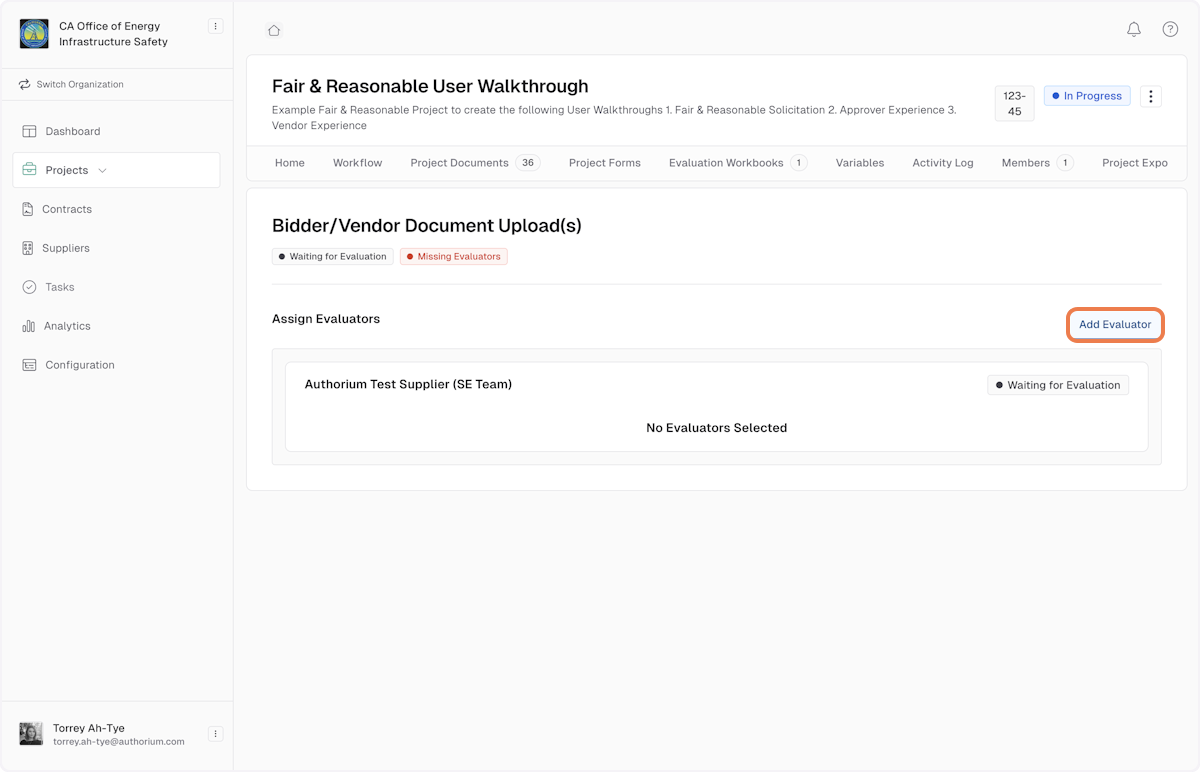
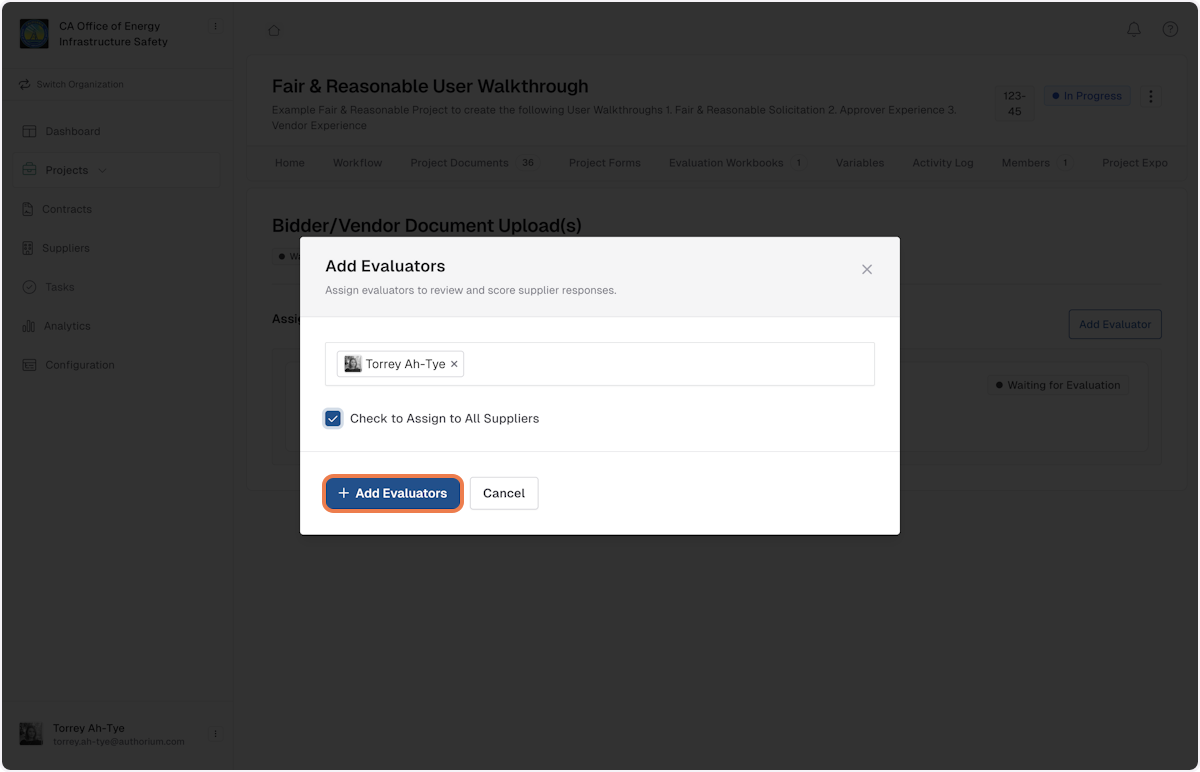
54. Click on Add Evaluators
This step will let you determine who should be invited to partake in the evaluation process.
This step does not send out notifications yet (see below).
55. Click on Begin Evaluation
Initiate the evaluation stage.
Use a custom form (e.g., big PI replica) to compare vendor quotes.
Process:
Identify lowest-cost vendor (main evaluation criterion).
Save evaluation and submit it.

56. Click on Send for Evaluation
This will notify all evaluators added to the in the previous step.
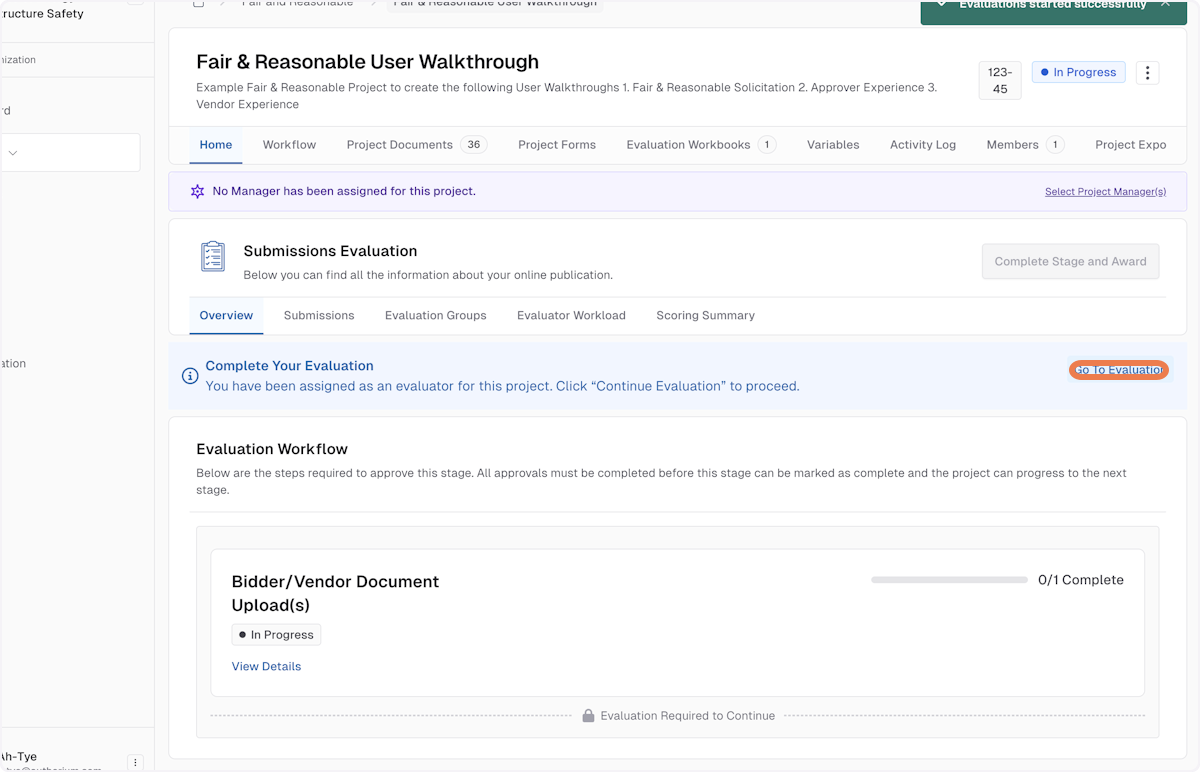
57. (Evaluator) Click on Go To Evaluation
58. (Evaluator) Click on Save Response
The evaluator(s) will be prompted to complete the evaluation by looking at the vendor submissions and indicating if they Pass or Fail on certain criteria.
The evaluator with repeat these evaluation steps for each field indicated in the evaluation
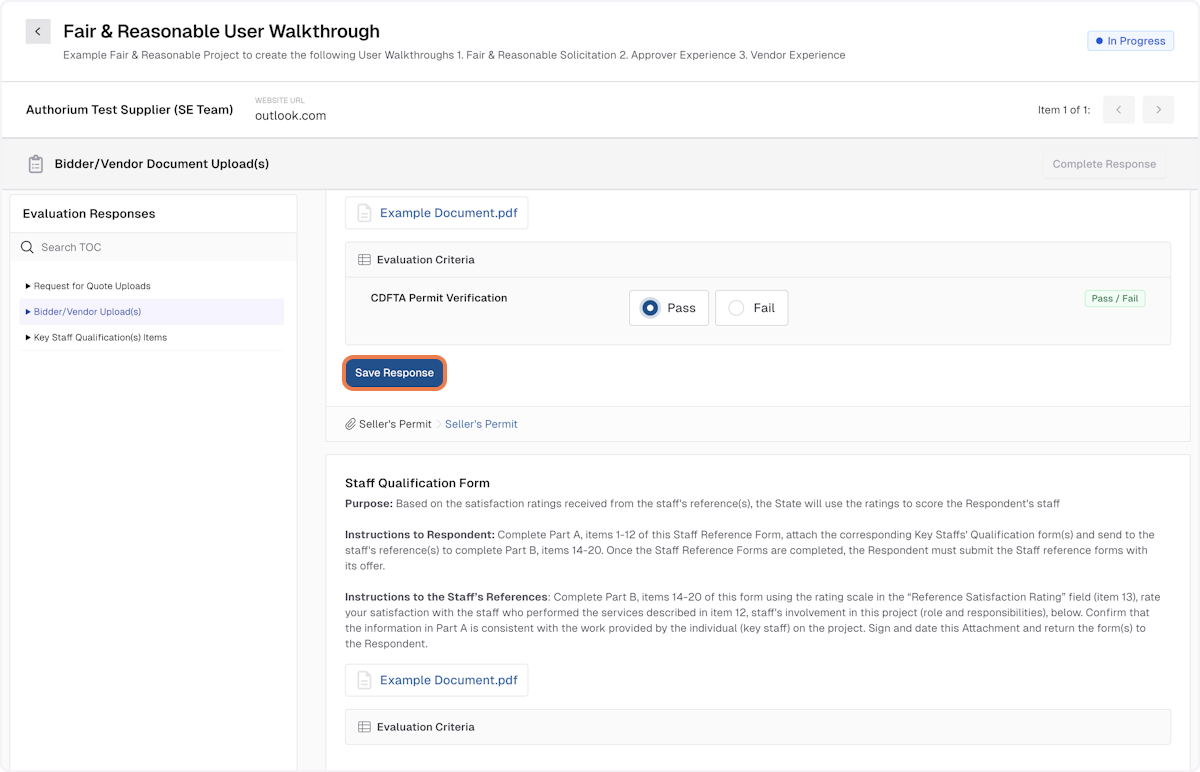
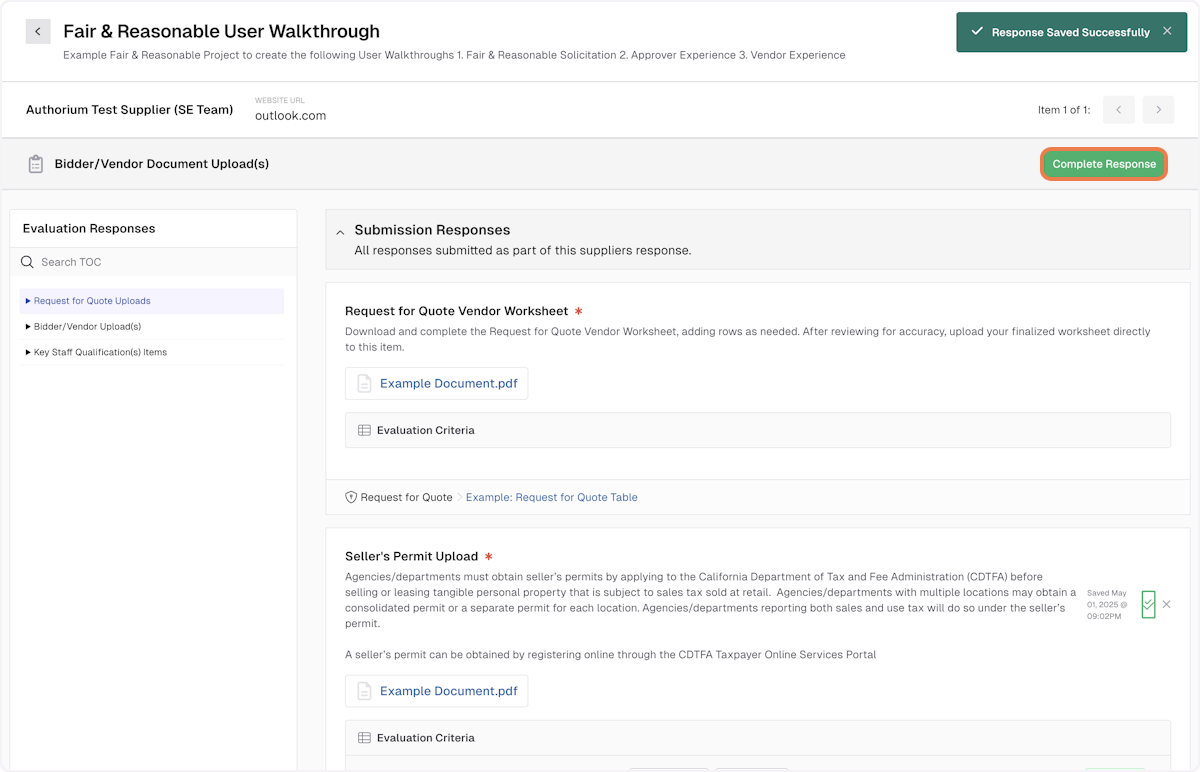
59. Click on Complete Response
This button will become available once all responses are complete.
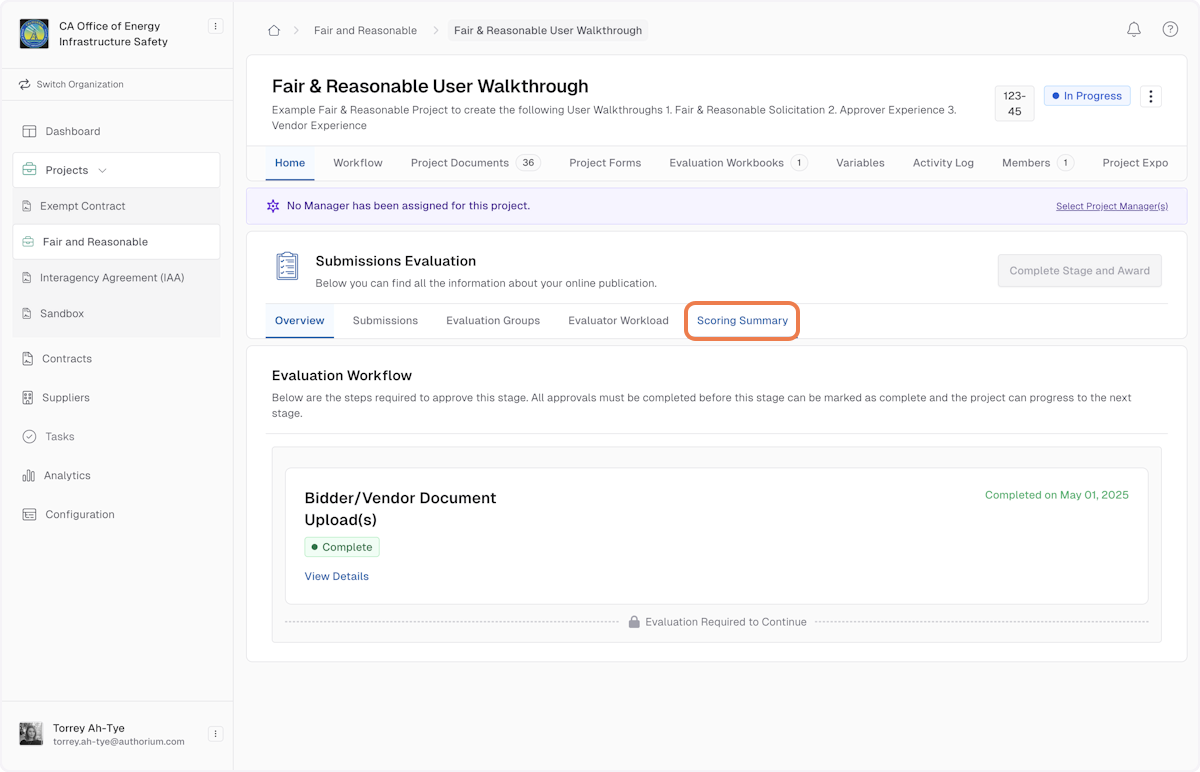
60. From the Project Workflow, Navigate to Submission Evaluations, and click on Scoring Summary
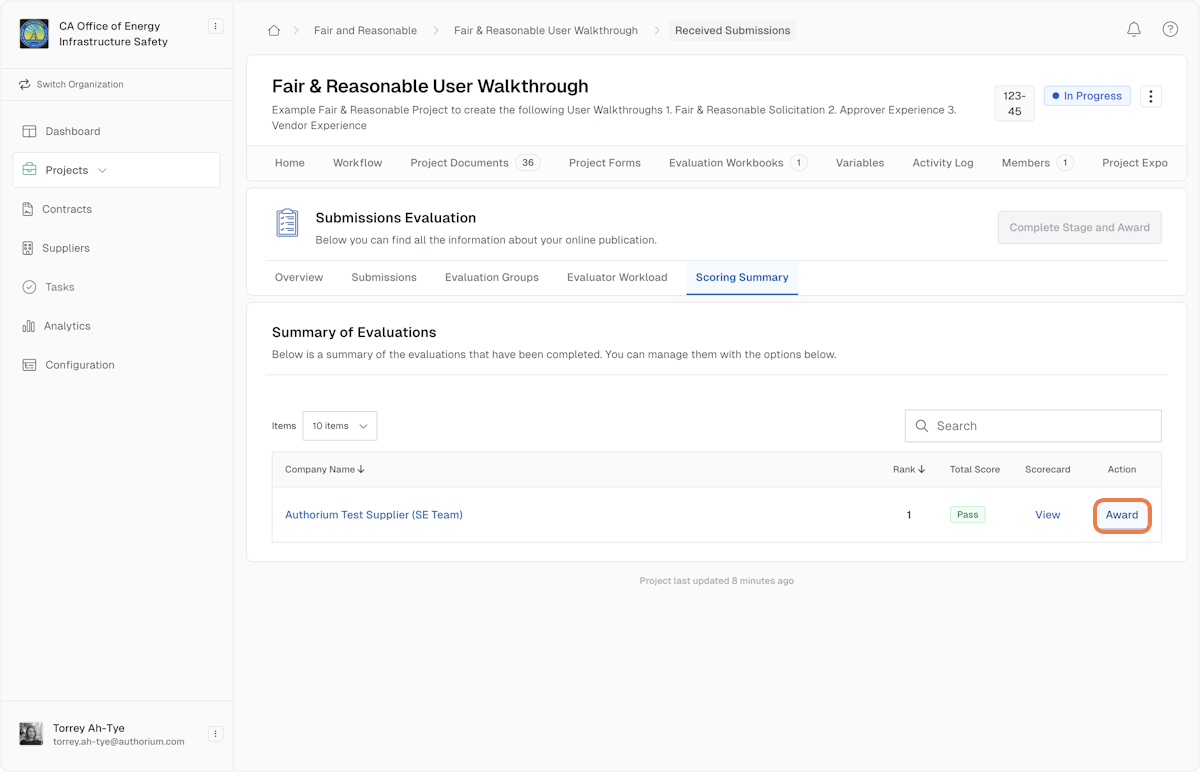
61. You will see all vendors who submitted complete bids with their final scores
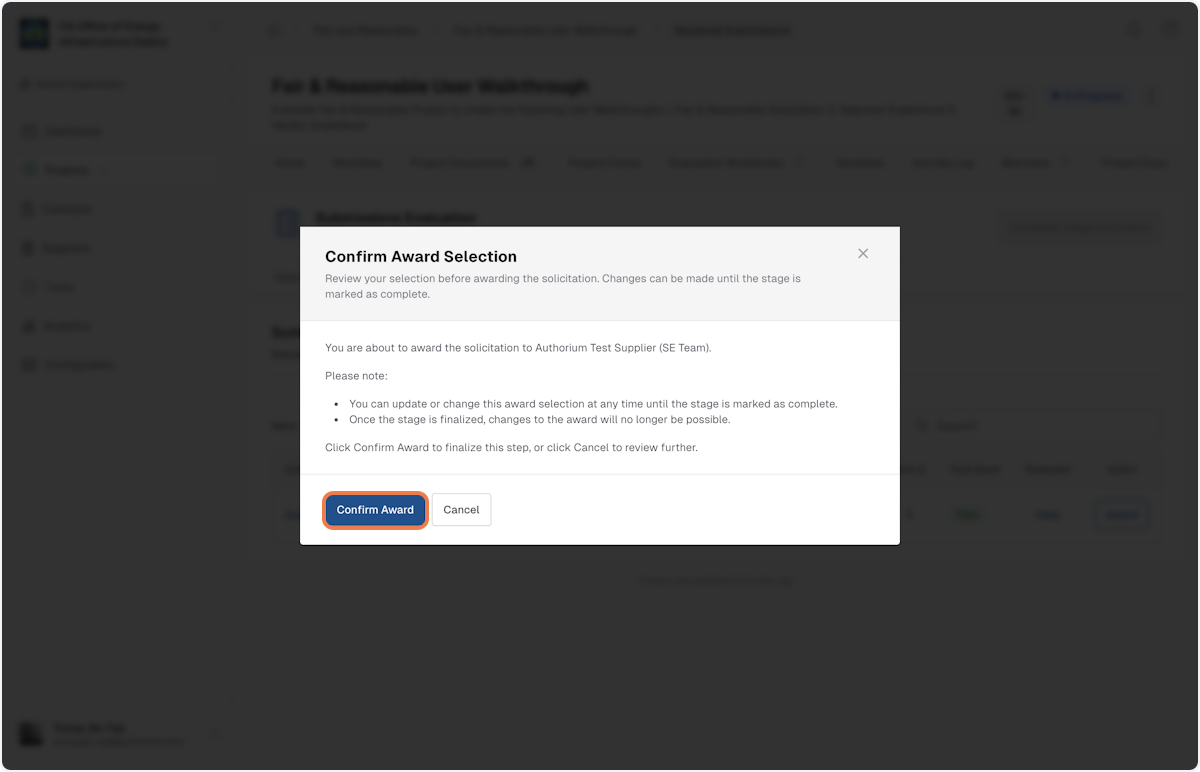
Confirm the winning vendor, and click Award
You will be prompted to Confirm and Complete the Stage.
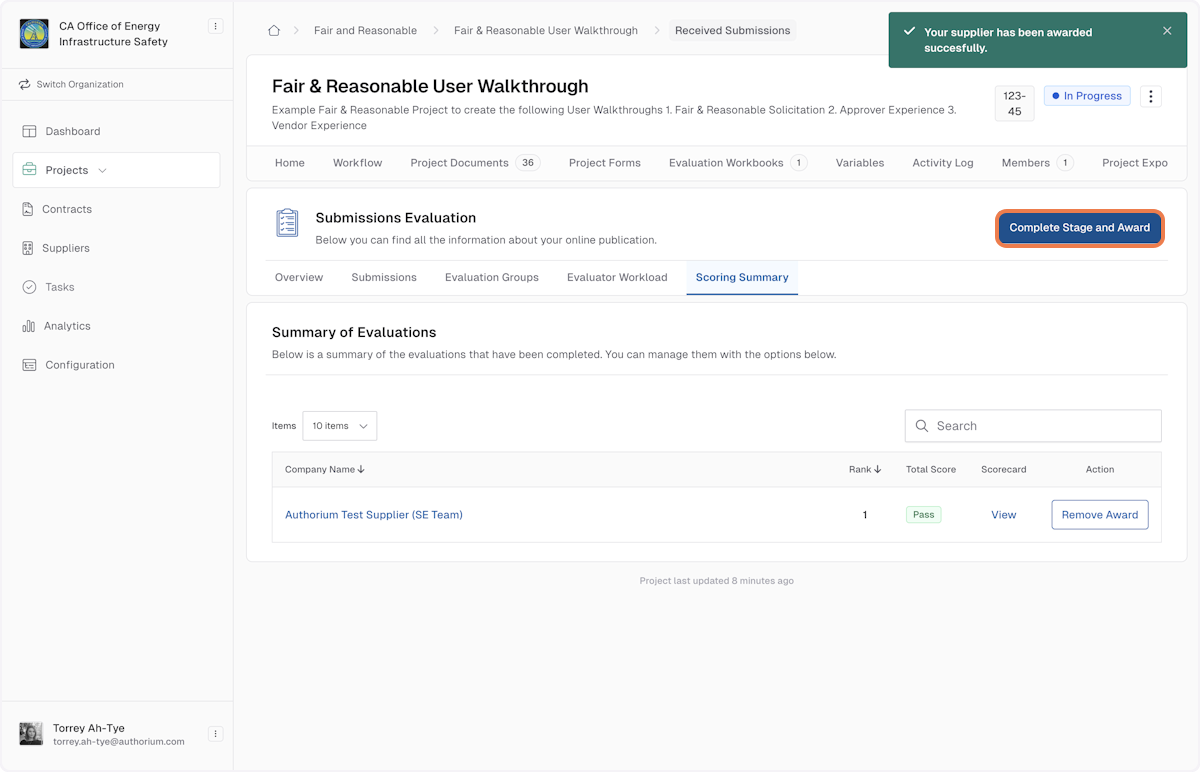
62. Click on Confirm Award
This will not notify the winning vendor yet. Proceed to completing the stage to finalize the award selection and notify the winning vendor.
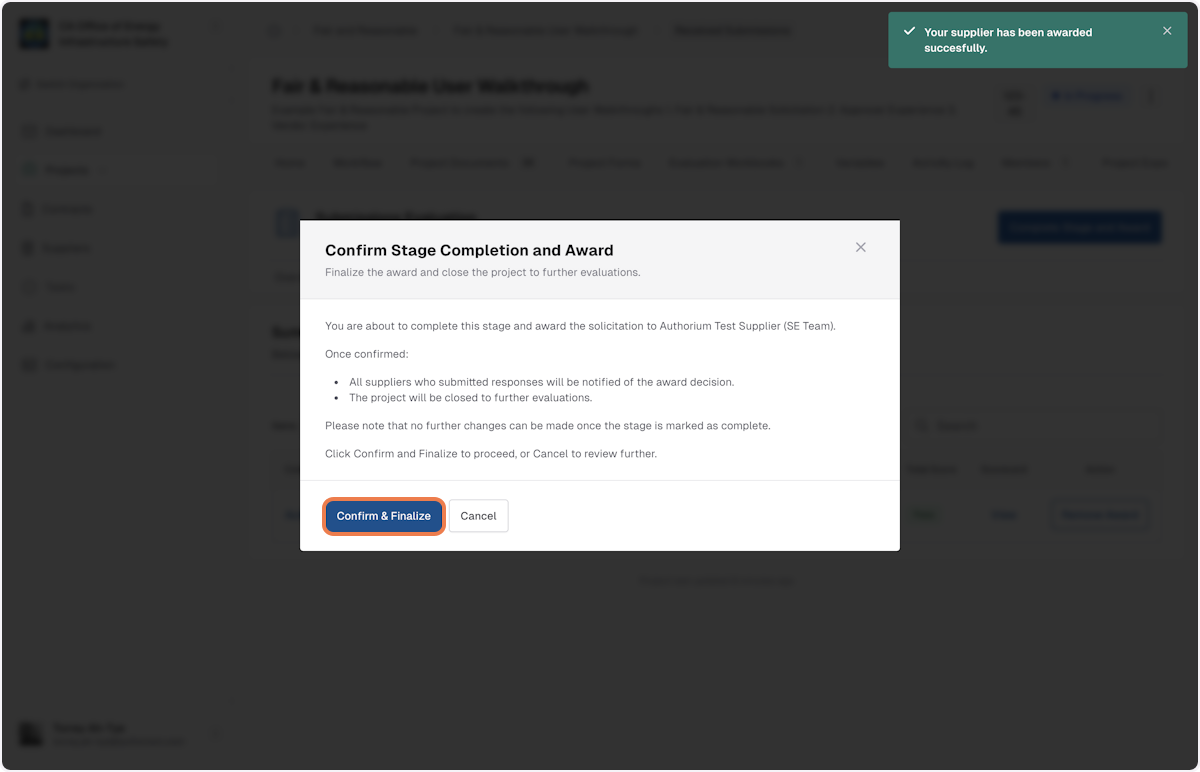
63. Click on Complete Stage and Award
64. Click on Confirm & Finalize
65. Click on Mark Stage As Complete
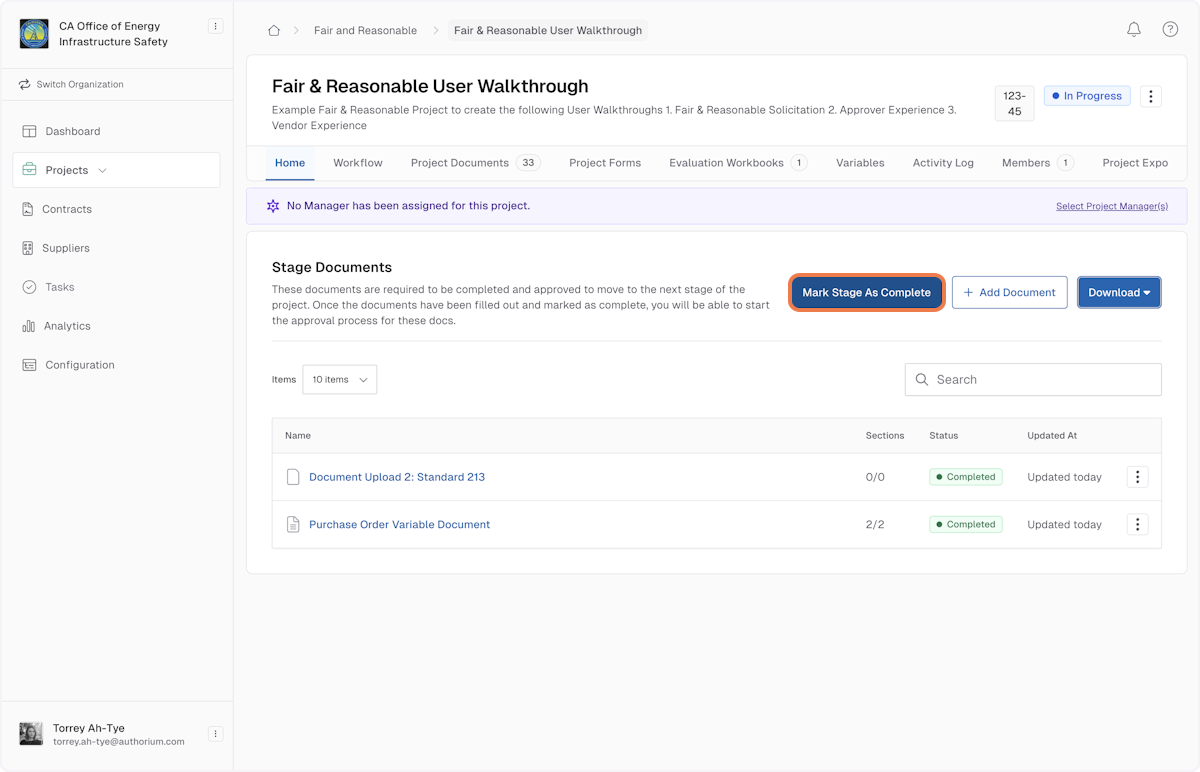
66. Click on Confirm & Continue
This will give you the option to customize notifications to the awarded recipients.
Final Checks & Project Completion
67. The F&R Solicitation is now complete - Compliance Wrap-Up
The winning Vendor has been awarded.
Final tasks post-award:
OAC check
Tax delinquency verification
STD 213
Generate purchase order document (summary for Fi$Cal).
Upload final PO to the system after it is processed outside Authorium.
Note: Unlike most workflows, the Fair & Reasonable process ends with a purchase order upload rather than a formal CD&E stage. This is because post-award steps happen outside of Authorium, typically in FISCal, where POs are generated and executed. After the vendor is awarded, the relevant data is exported and manually entered into FISCal. The PO variable document and PO upload stage are used to finalize the process within Authorium.
Note: This is expected to evolve once FISCal API integrations are available.

Related Articles
User Guide: Global Data Sets
This user guide contains step-by-step instructions for using the feature Global Data Sets. Global Data Sets are reusable collections of data that can be configured for project forms, ensuring consistency, standardization, and efficient data ...Vendor Experience
Step-by-Step User Guide Last updated: May 8, 2025 Getting Started 1. Congratulations! You have been invited to partake in a government solicitation as a vendor. Access the Solicitation Portal to proceed. You will receive an email prompting you to ...User Roles and Permissions
Overview of Authorium’s Permissioning Structure Authorium uses a role-based permissions model at two levels: the organization level and the project level. Organization roles govern platform-wide administrative capabilities, while project roles ...Authorium Overview
Authorium is a digital platform that modernizes and streamlines collaboration among government administrators by providing a centralized place to create, review, and approve a wide range of documents and contracts - from procurement to budgets, ...Supporting Users
Supporting Users Overview You may need to support users as they get started with Authorium or if they run into issues logging in, resetting their password, switching between organizations, or completing other basic tasks. Topics in this section: ...